The Game Boy I was allowed to break: building a chiptune machine, 2017
 Aug 09, 2026

In 2017 I turned an original Game Boy into a musical instrument. Backlight, inverted screen, new button pads, and a pair of RCA jacks out the top so it could be recorded properly. The point was to run LSDj on it and write chiptunes on real hardware instead of a plugin.
Almost none of that was my idea. Every step in this post was worked out by somebody else years earlier and published with photographs. What I actually had to get right was the order, because one of these steps cannot be undone and I only had one console I was willing to lose.
One honest note before anything else. I’m working from photographs, a shipping email, and memory, and where the photographs disagree with the memory I’ve gone with the photographs. There are a few places below where they did.
Two Game Boys, and only one of them is available
I have two original Game Boys. Both are model DMG-01, because every original Game Boy is a DMG-01. What differs between them is the board inside.
The first one is mine from when I was eleven. It’s the yellowed one in the photograph at the top of this post, and it has never been opened. It doesn’t get opened. It’s not sentimentality about the object so much as the fact that it’s the only physical thing I still own from that part of my life, and a soldering iron is a one-way door.
The second one I bought later, secondhand, specifically to take apart.
Before I ordered any parts I pulled the battery cover off the donor and read the board revision through the little window in the back. You can see it in the photograph: DMG-CPU-03.
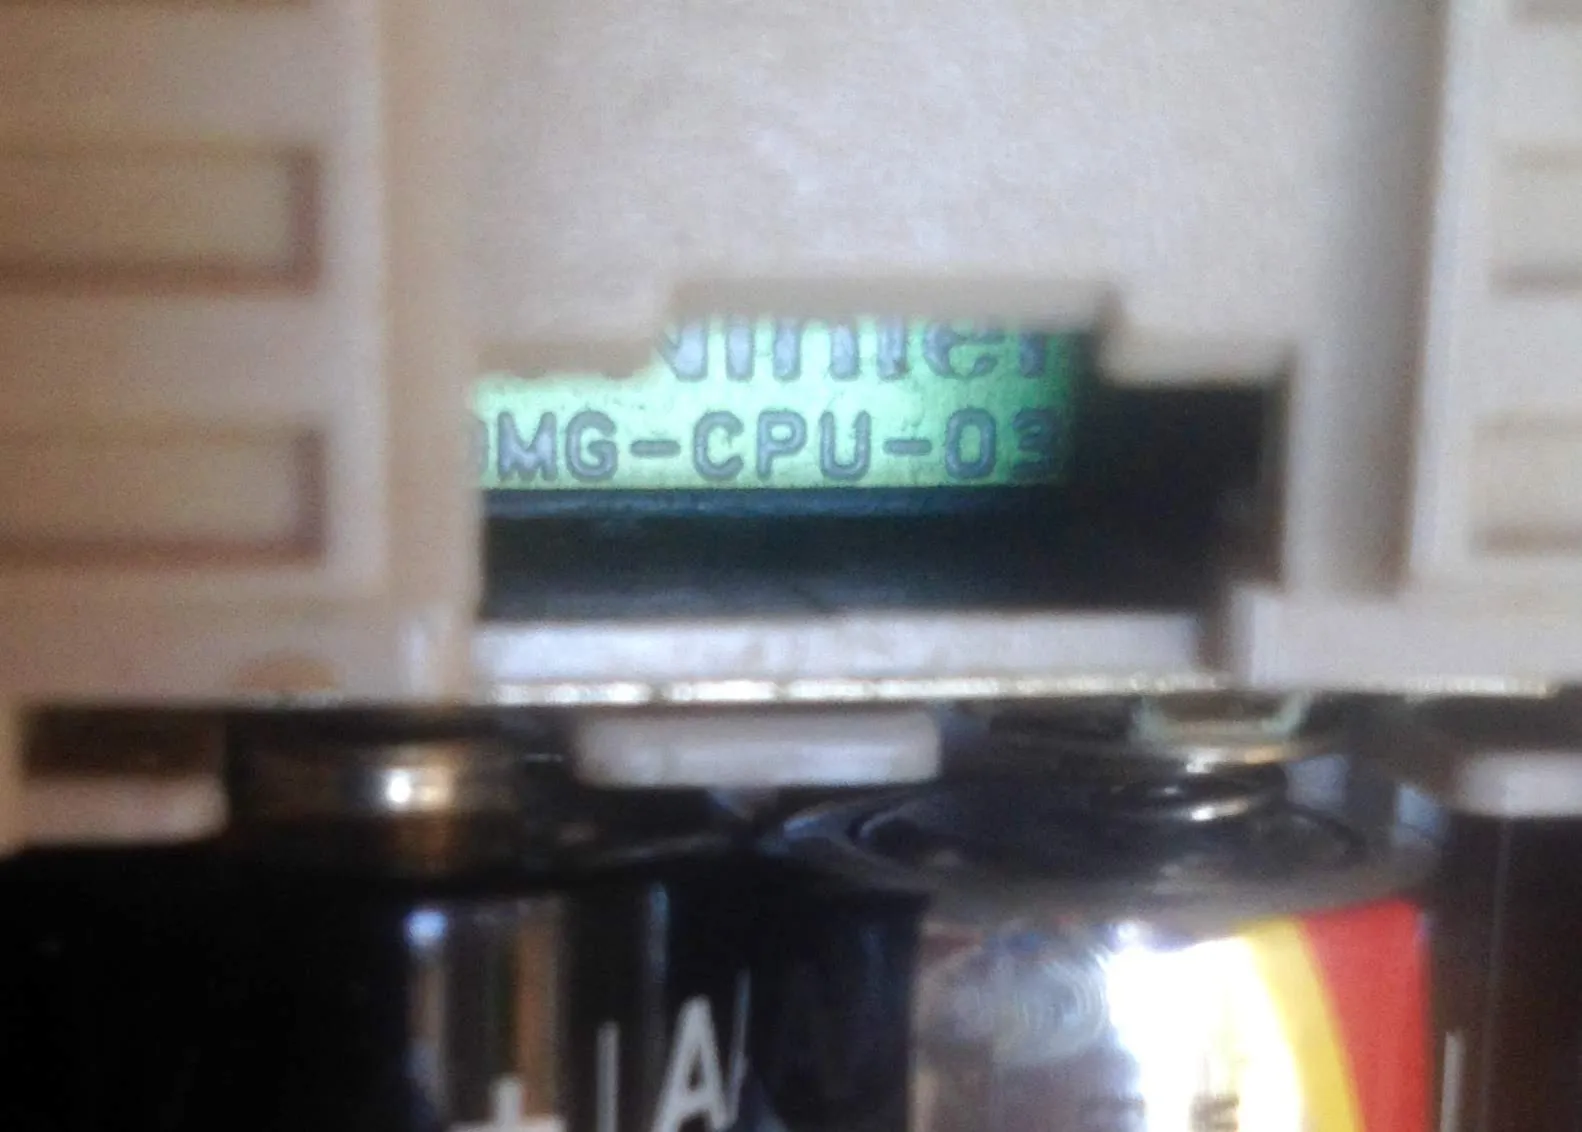
The donor’s board, read through the battery window without opening anything. Eight CPU board revisions exist for the DMG. This is the third.
That check mattered because the revisions are not interchangeable for what I wanted. The chiptune consensus is to use DMG-CPU-04 through 08 for LSDj and skip the first three, and the specific complaint about the 02 and 03 boards is sample playback on the wave channel. It’s worth being precise about what that means: these are different analog characteristics, not defects. LSDj runs fine on a 03. Plenty of people use them. It just isn’t the board anybody recommends when the whole purpose is music.
I bought it anyway. I knew the revisions differed and I checked before I spent the money, which is why that photograph exists at all. Whether I understood at the time exactly what a CPU-03 does to sample playback, I honestly can’t tell you nine years later, and I’d rather leave that gap visible than invent the version where I knew.
My first Game Boy was never a candidate for any of this, and that single constraint gave the whole project its shape: every step that could not be undone had to happen to the console I could afford to lose.
Nine months of nothing
The parts came from Hand Held Legend in Willow Grove, Pennsylvania. Order 9296: silicone button pads, a version 2 white backlight for the DMG and Pocket, a bivert module, a replacement grey glass screen lens, and a tri-wing screwdriver, because Nintendo used a screw head specifically so you would not do this.
It shipped on October 3rd, 2016.
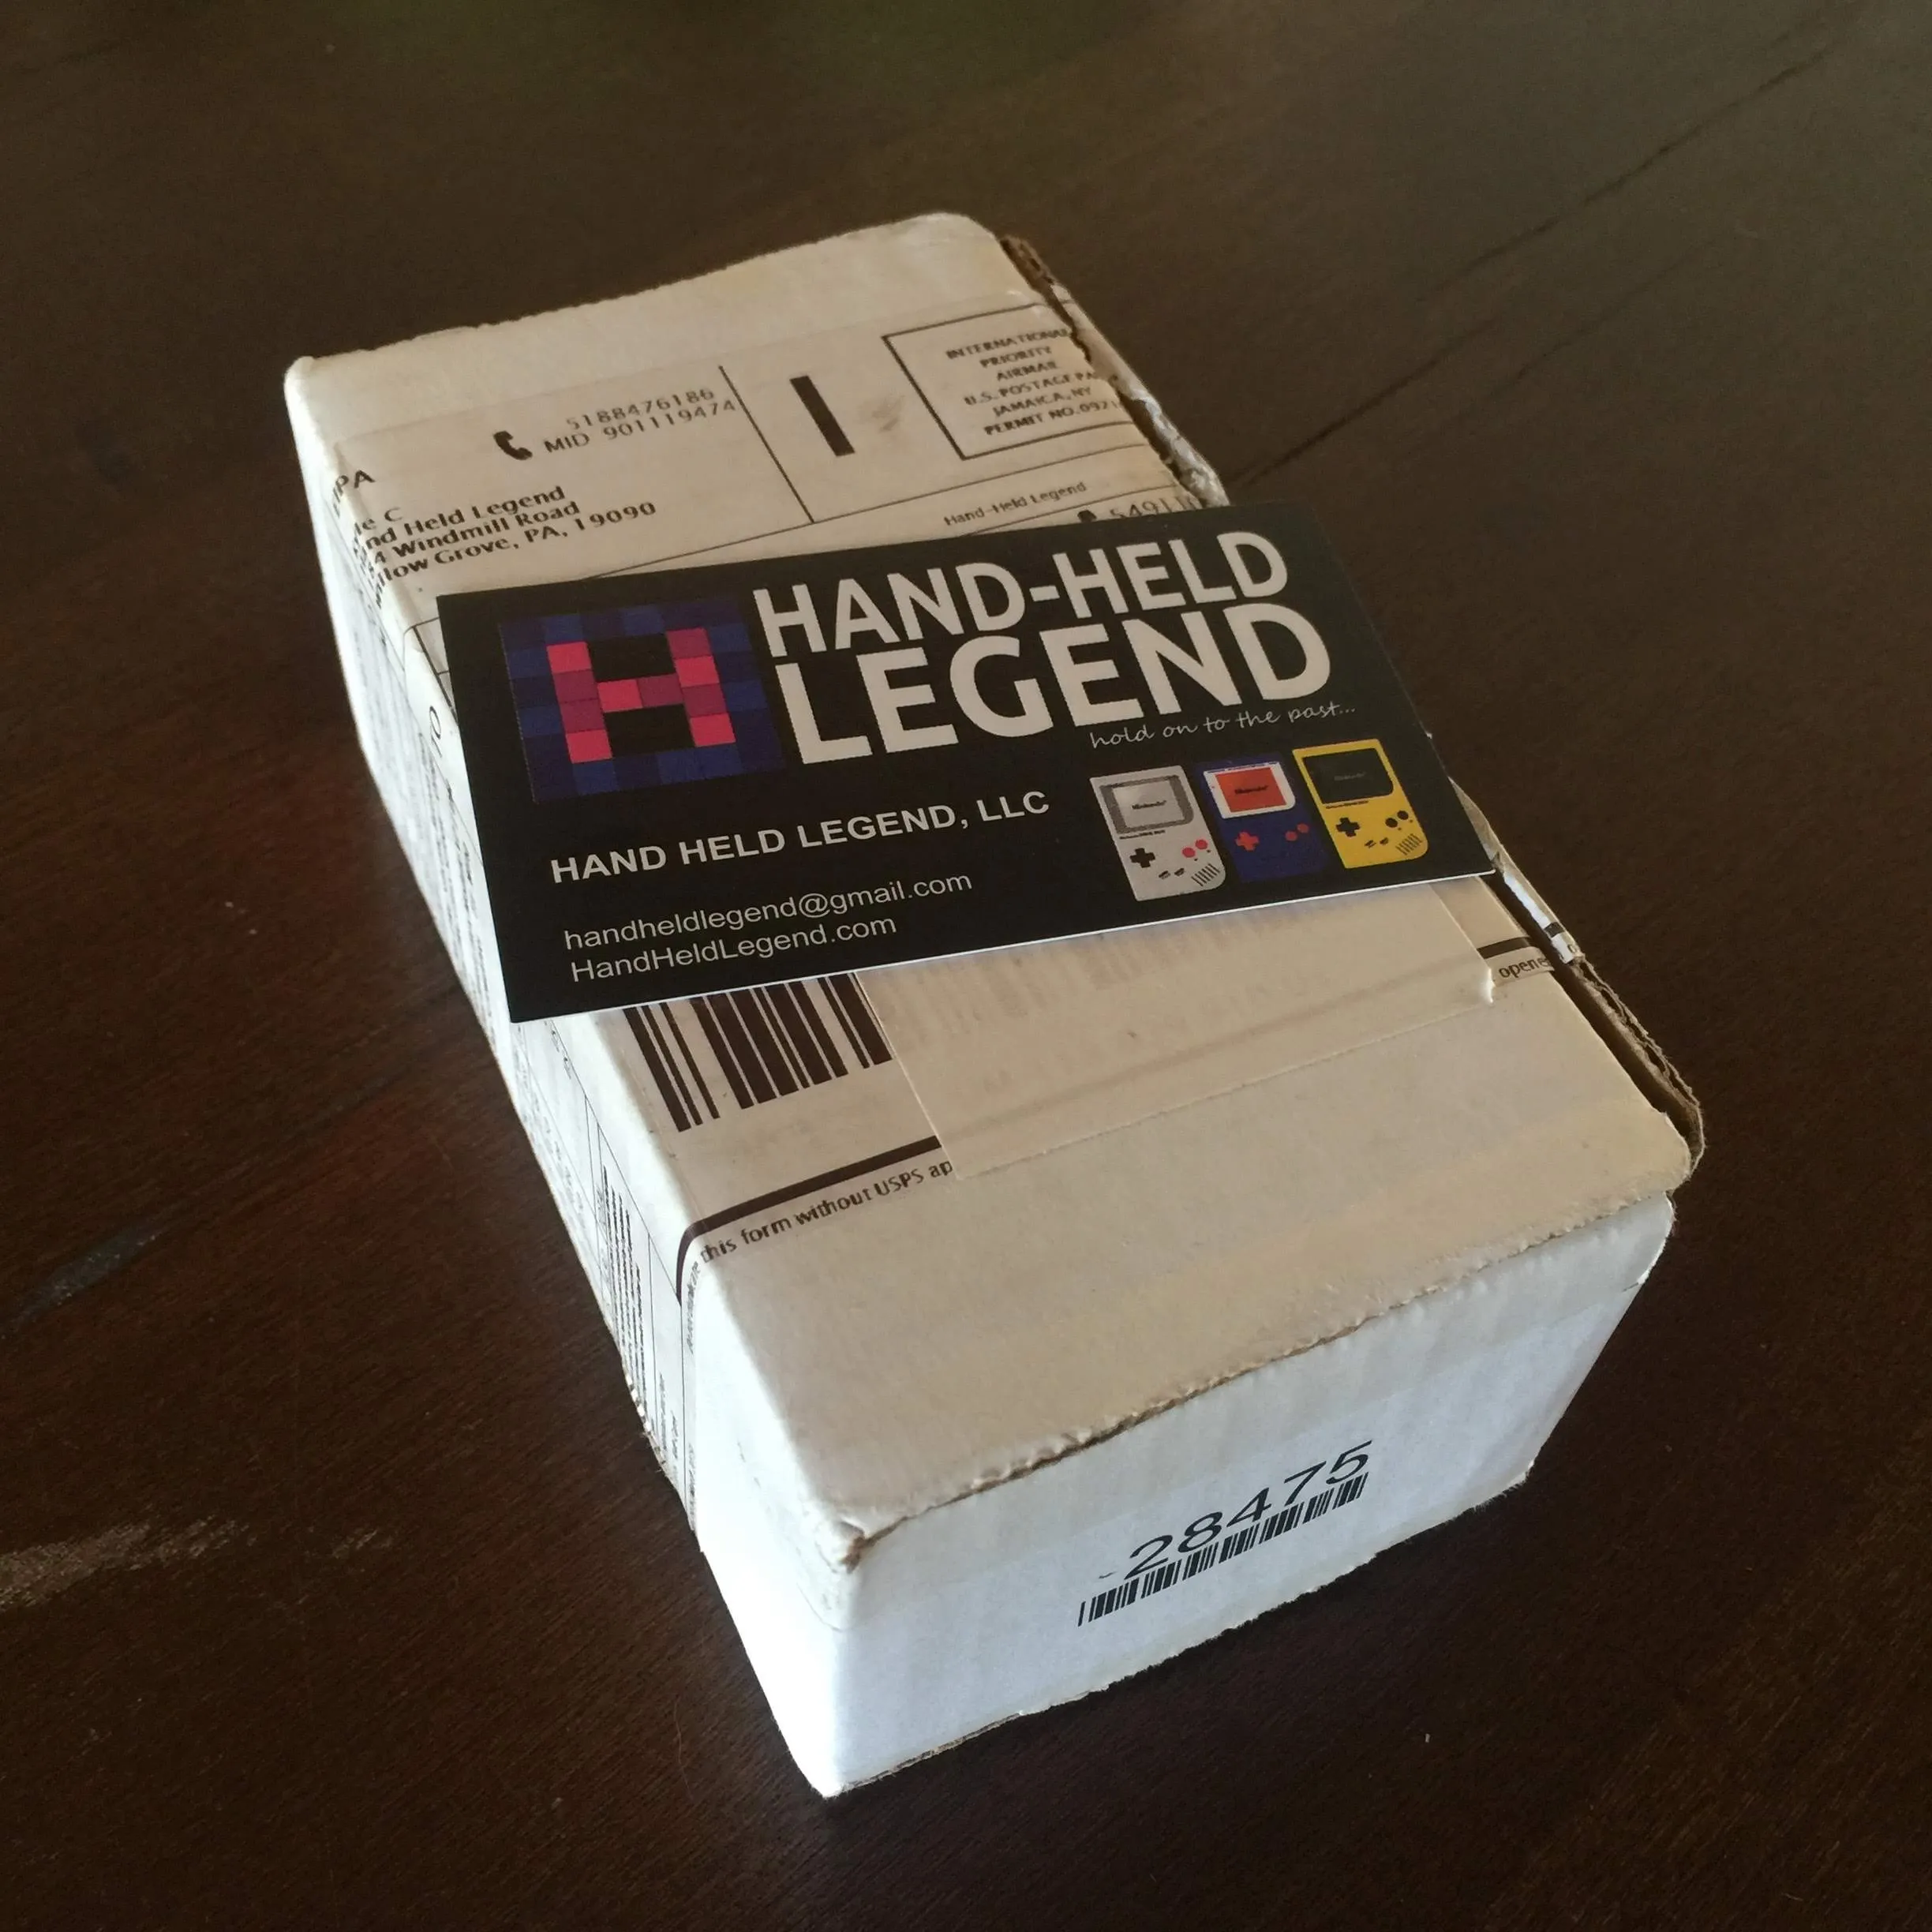
The box, photographed the day it landed. February 3rd, 2017.
Four months in transit. I remembered it as “a couple of months” until I looked at the timestamp on that photograph, and four is the real number. That’s what ordering hobby electronics into Argentina looked like, and to be fair to everybody involved, it did arrive.
Then it sat in a drawer until the end of June.
I’d like to tell you there was a reason. There wasn’t. The parts landed in February and I opened the box for real on June 30th, which means the honest shape of this project is four months of shipping, five months of nothing, and then one week where I did all of it at once.
Everything comes apart, and the screws go somewhere
June 30th, nine at night. The donor came apart.
A Game Boy has screws in four different lengths and they are not interchangeable. Put a long one where a short one goes and it presses into the board. Put a short one in a case post and the shell never closes properly again. None of them are labelled, and by the time you’ve got the thing in five pieces across a desk you will not remember which pile came from where.
So before I removed anything I drew a map. A sheet of paper, four zones written out by hand, and each group of screws taped down under packing tape in its own zone as it came out: case, LCD panel, sound jack, back metal plate.
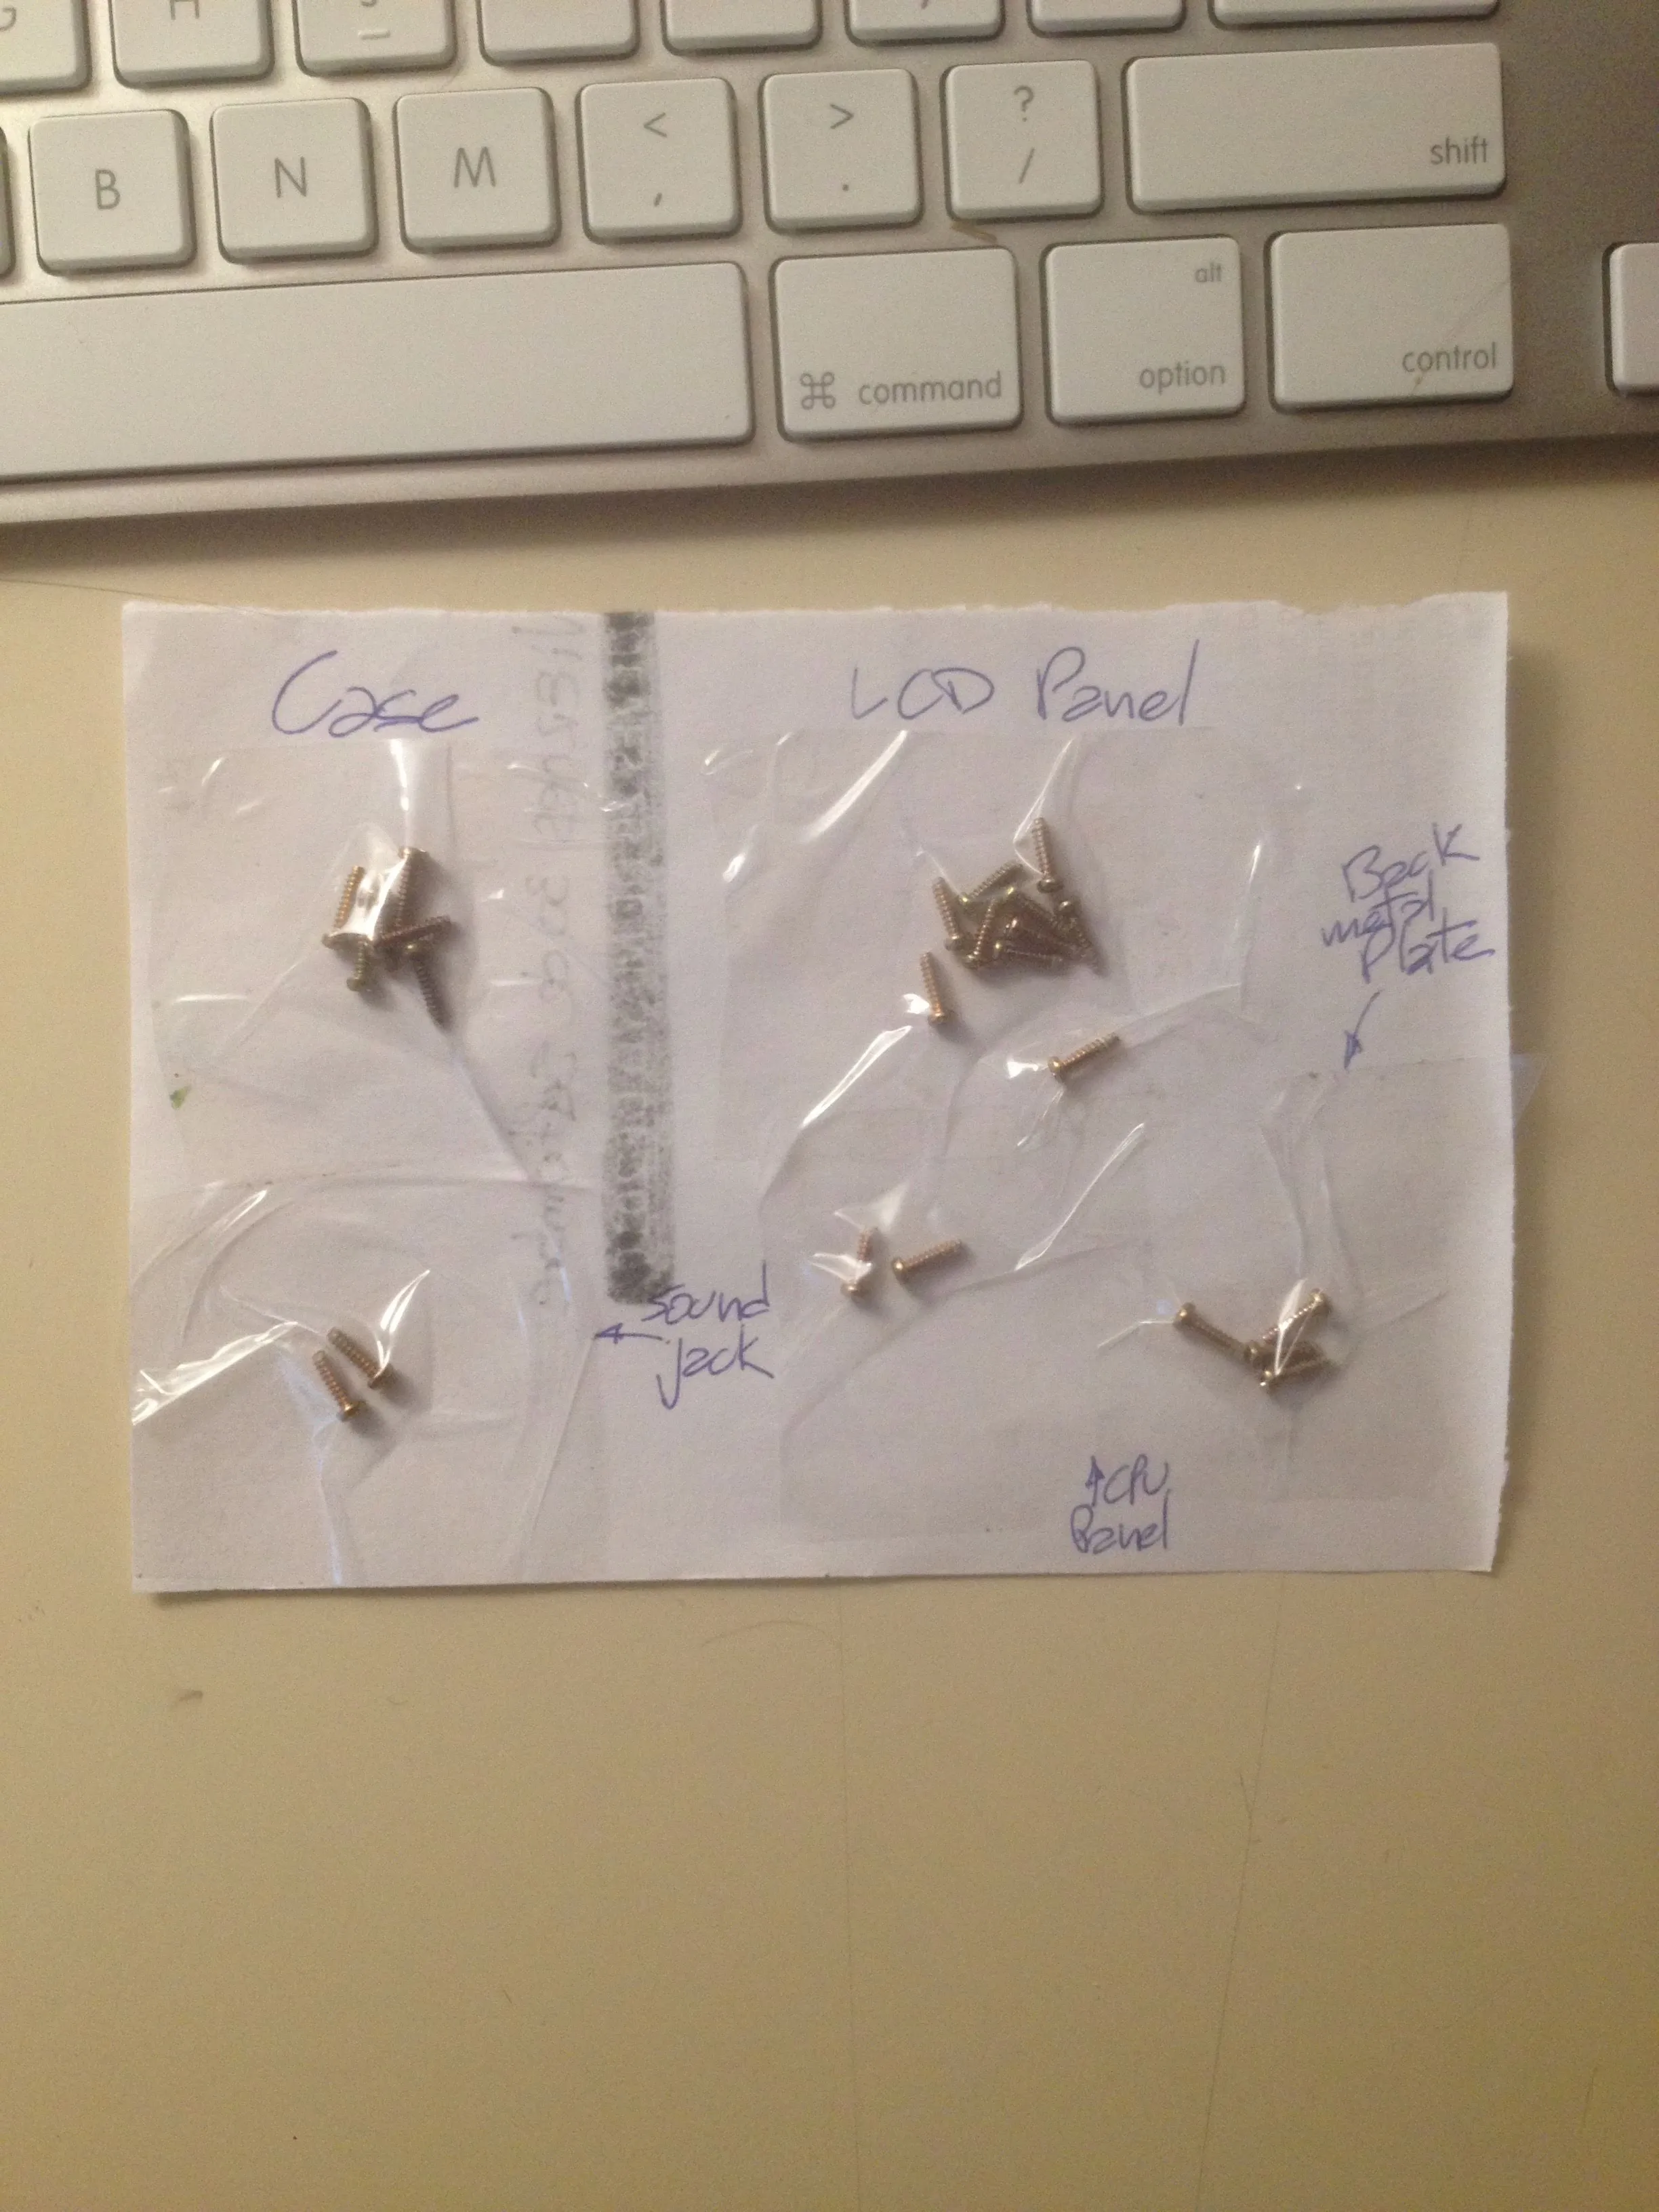
The screw map. Ten minutes of work at the start of the project, and the reason reassembly took twenty minutes instead of an evening of trial and error.
Nobody’s tutorial tells you to do this. I’ve taken apart enough equipment to know that disassembly is the easy half and that projects die on the way back together, usually quietly, weeks later, when the case develops a rattle nobody can explain.
TAKEAWAY: label the parts on the way out, not on the way in. The ten minutes you spend before the first screw comes out is the cheapest insurance in the whole job.
A Sunday, some peroxide, and seven hours of winter sun
July 2nd was a Sunday, cold and completely clear, which in Buenos Aires in July is the good kind of day.
Thirty years of daylight had turned the donor’s shell the same mustard colour as my own. That yellowing isn’t dirt and it doesn’t wash off. The plastic is ABS, and ABS from that era carries brominated flame retardants. Ultraviolet light breaks those down, bromine comes loose, it finds oxygen, and the compound it forms is yellow. The colour is a chemical change in the material itself.
The fix, called retrobrite, is hydrogen peroxide plus more ultraviolet light. The peroxide oxidises the free bromine back to something colourless, and the sunlight drives the reaction. I used salon developer cream, which is peroxide thick enough to stay where you put it, painted it onto the shell, wrapped every piece in stretch film to stop it drying out, and put the lot in a metal tray in the middle of the garden.
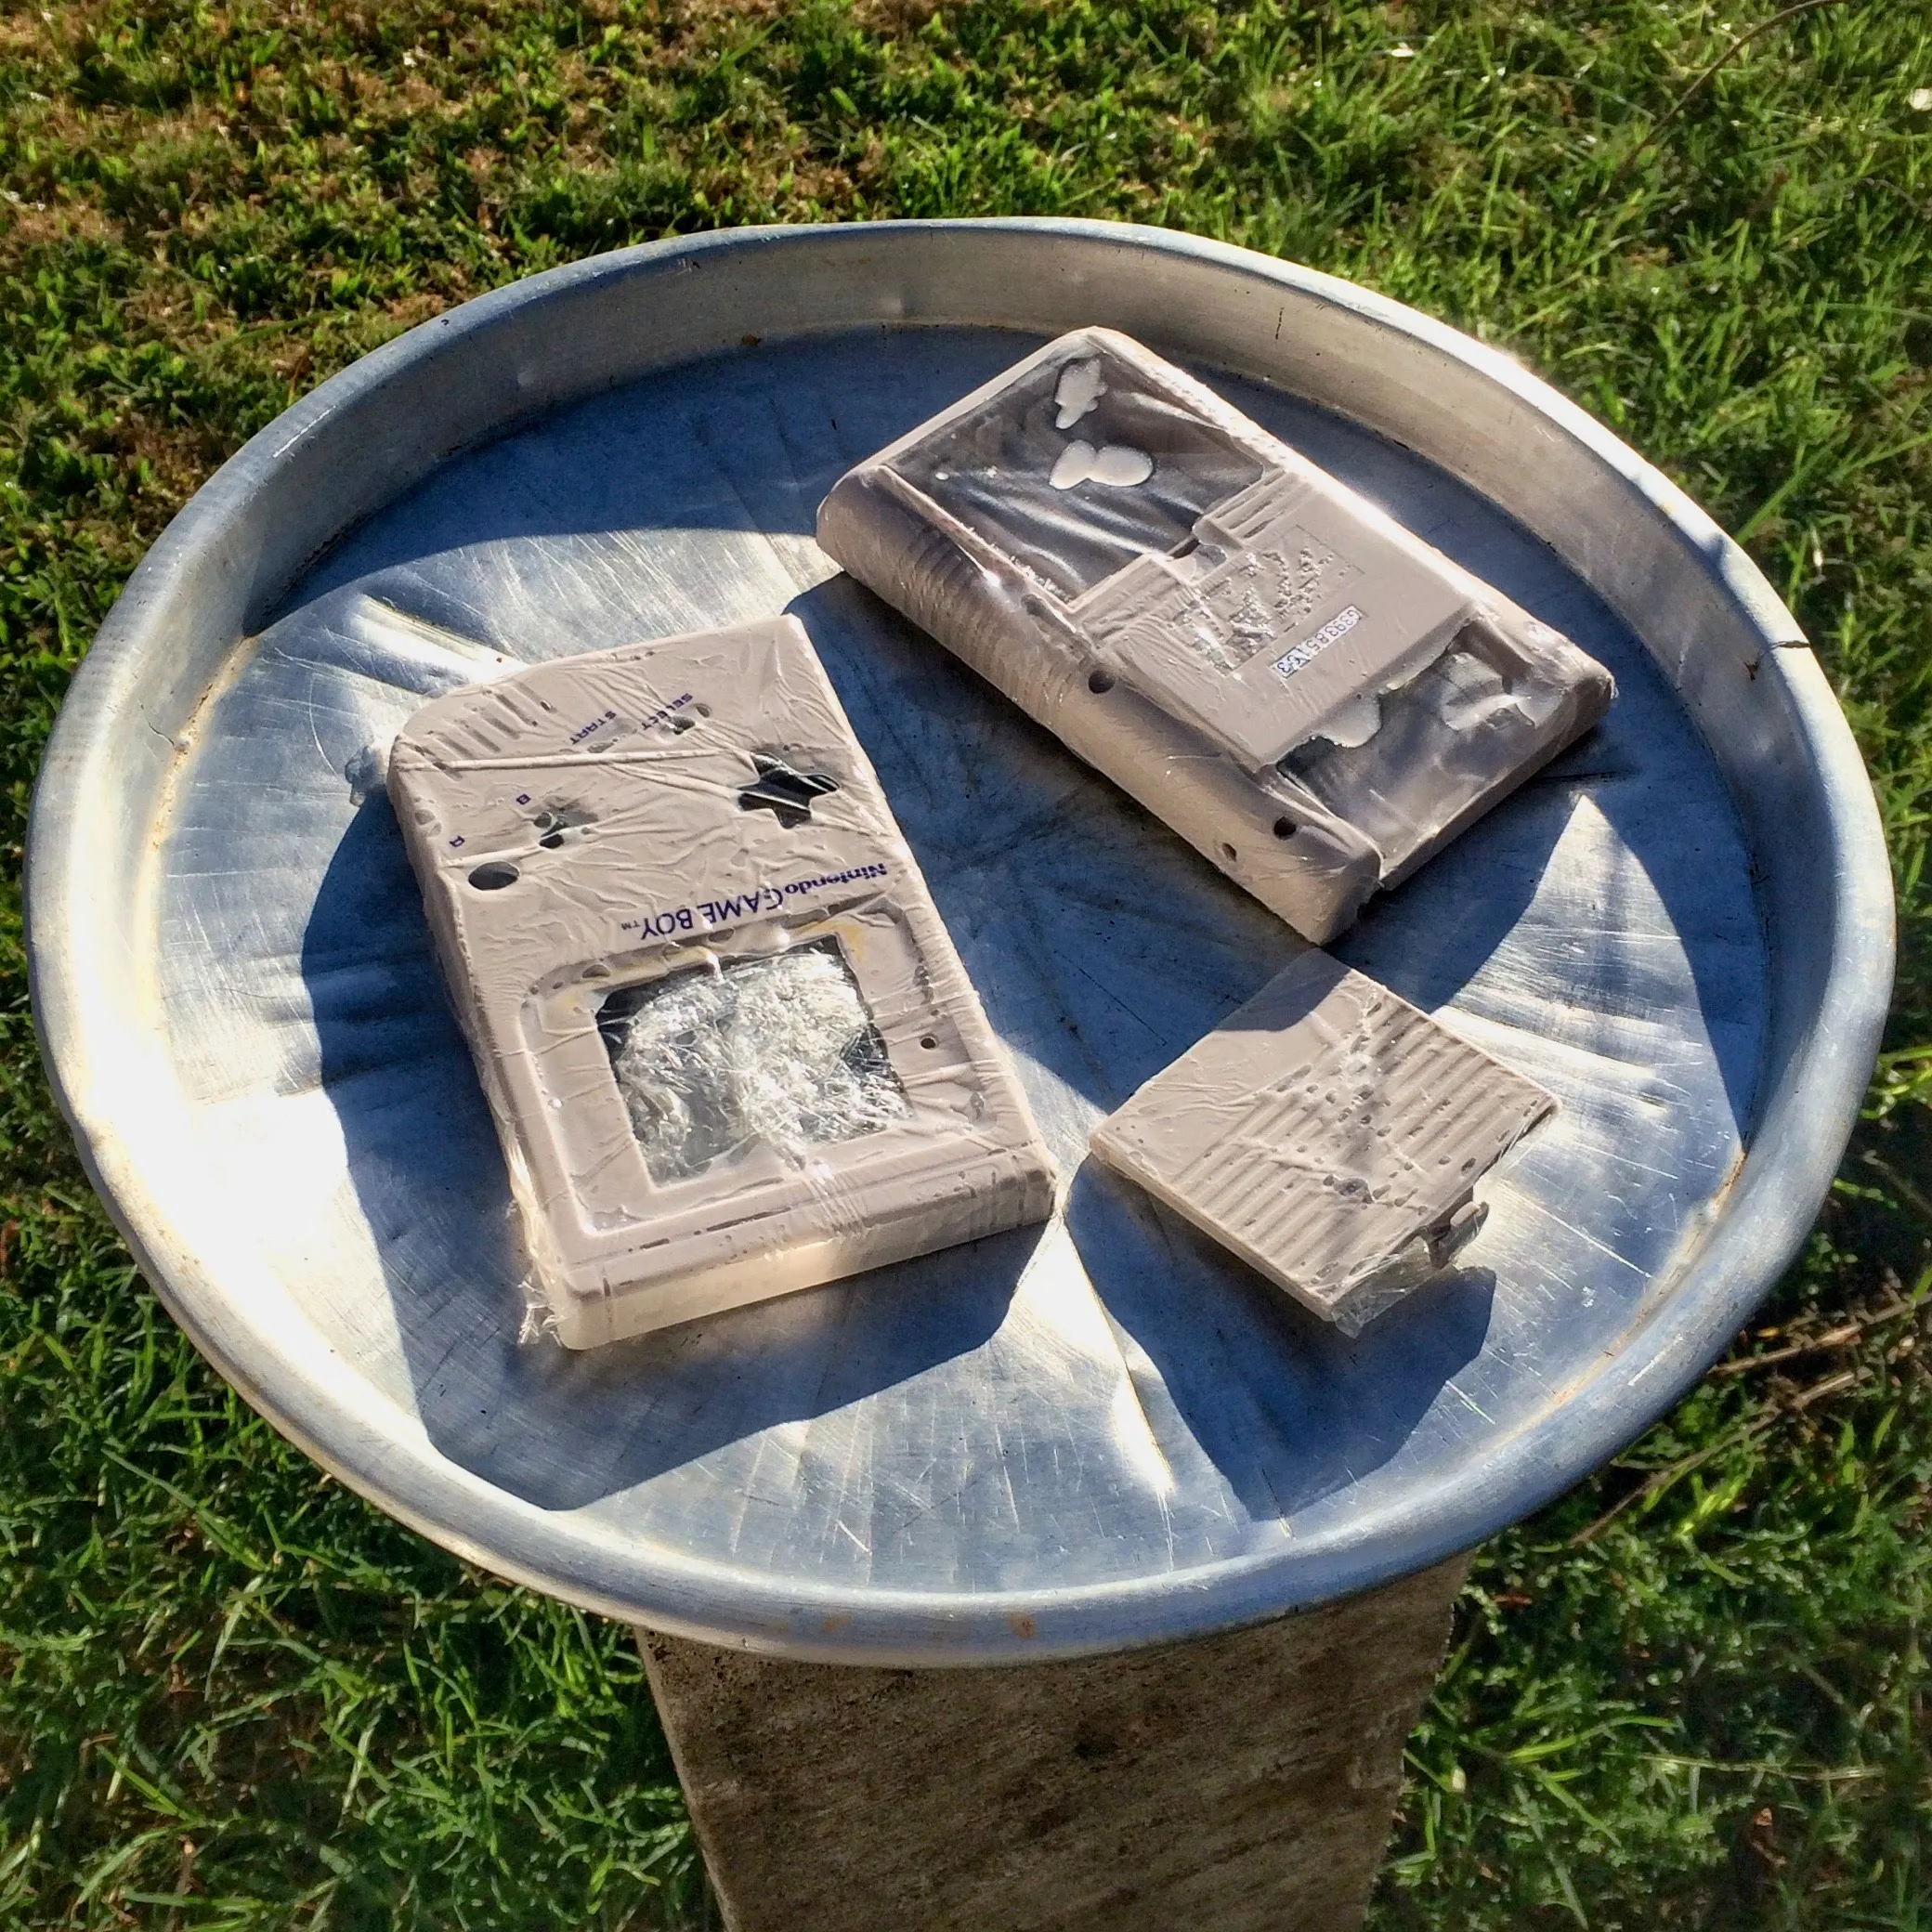
Half past nine in the morning, July 2nd, 2017. Front shell, back shell and battery cover, painted, wrapped, and put out to cook.
Then I moved it around the garden all day chasing the sun, like a very slow sundial, for about seven hours.
The result is the photograph at the top of this post, taken that evening. I did not expect it to work that well. Thirty years of yellow came off a piece of 1980s plastic using a bottle from a hairdressing supply shop and one clear afternoon.
One caveat that belongs here, because leaving it out would make this sound better than it is. Retrobrite is a surface treatment. The yellow compounds sit all the way through the plastic, and what comes off the outside eventually diffuses back out. It also does the material no favours. Eight years on, this shell has held up well. It will not hold up forever.
The cheapest possible test
With the shell drying, the next thing in front of me was the screen work, which is the step everybody warns you about.
I didn’t do it. I did the button pads instead.
The silicone pads were the cheapest item in the box and replacing them requires nothing but a screwdriver. But putting them in meant reconnecting the board, dropping in batteries and switching the thing on, and that answered a question I could not answer any other way: does this secondhand console, which I bought from a stranger and have now had in pieces on a desk, still actually work.
Testing the board with a part I could remove again told me the one thing worth knowing before I touched the screen, which was whether there was still a working Game Boy underneath any of this.
It booted. The buttons responded. So there was a project.
If it hadn’t booted, I’d have found out for the price of a set of button pads, with an intact screen and a console I could still sell to somebody else as working-except-for-whatever-was-wrong. That is a very different afternoon from discovering the same thing after destroying the LCD.
TAKEAWAY: when a step is expensive and irreversible, spend a little money first to find out whether it’s even worth attempting. Test the cheap thing, then commit.
The part with no undo
July 7th, late. This is the one.
To backlight a DMG you have to get behind the LCD, and the LCD has a reflective polarising film glued to the back of it. That film has to come off, because the whole point of a backlight is to put light where the reflector currently is. The glue is thirty years old and its behaviour varies from unit to unit for no reason anybody can predict.
The screen is a bare sheet of glass with a ribbon cable bonded along one edge. Bend it and it snaps. Push a blade too hard and it scratches, or you cut into the ribbon and the display is finished. When people say a Game Boy backlight mod went wrong, this is almost always the step they mean, and there is no recovering from it. The screen is not repairable.
I could have bought a replacement LCD. I didn’t want one. The entire appeal of doing this to a thirty-year-old console rather than buying a modern reproduction was that it stays the original machine, and a new screen is the one part that would have quietly made it something else.
So: a fresh blade held almost flat, a cotton swab, patience, and about an hour of lifting one corner and working across in small movements, stopping every time the glue changed its mind.
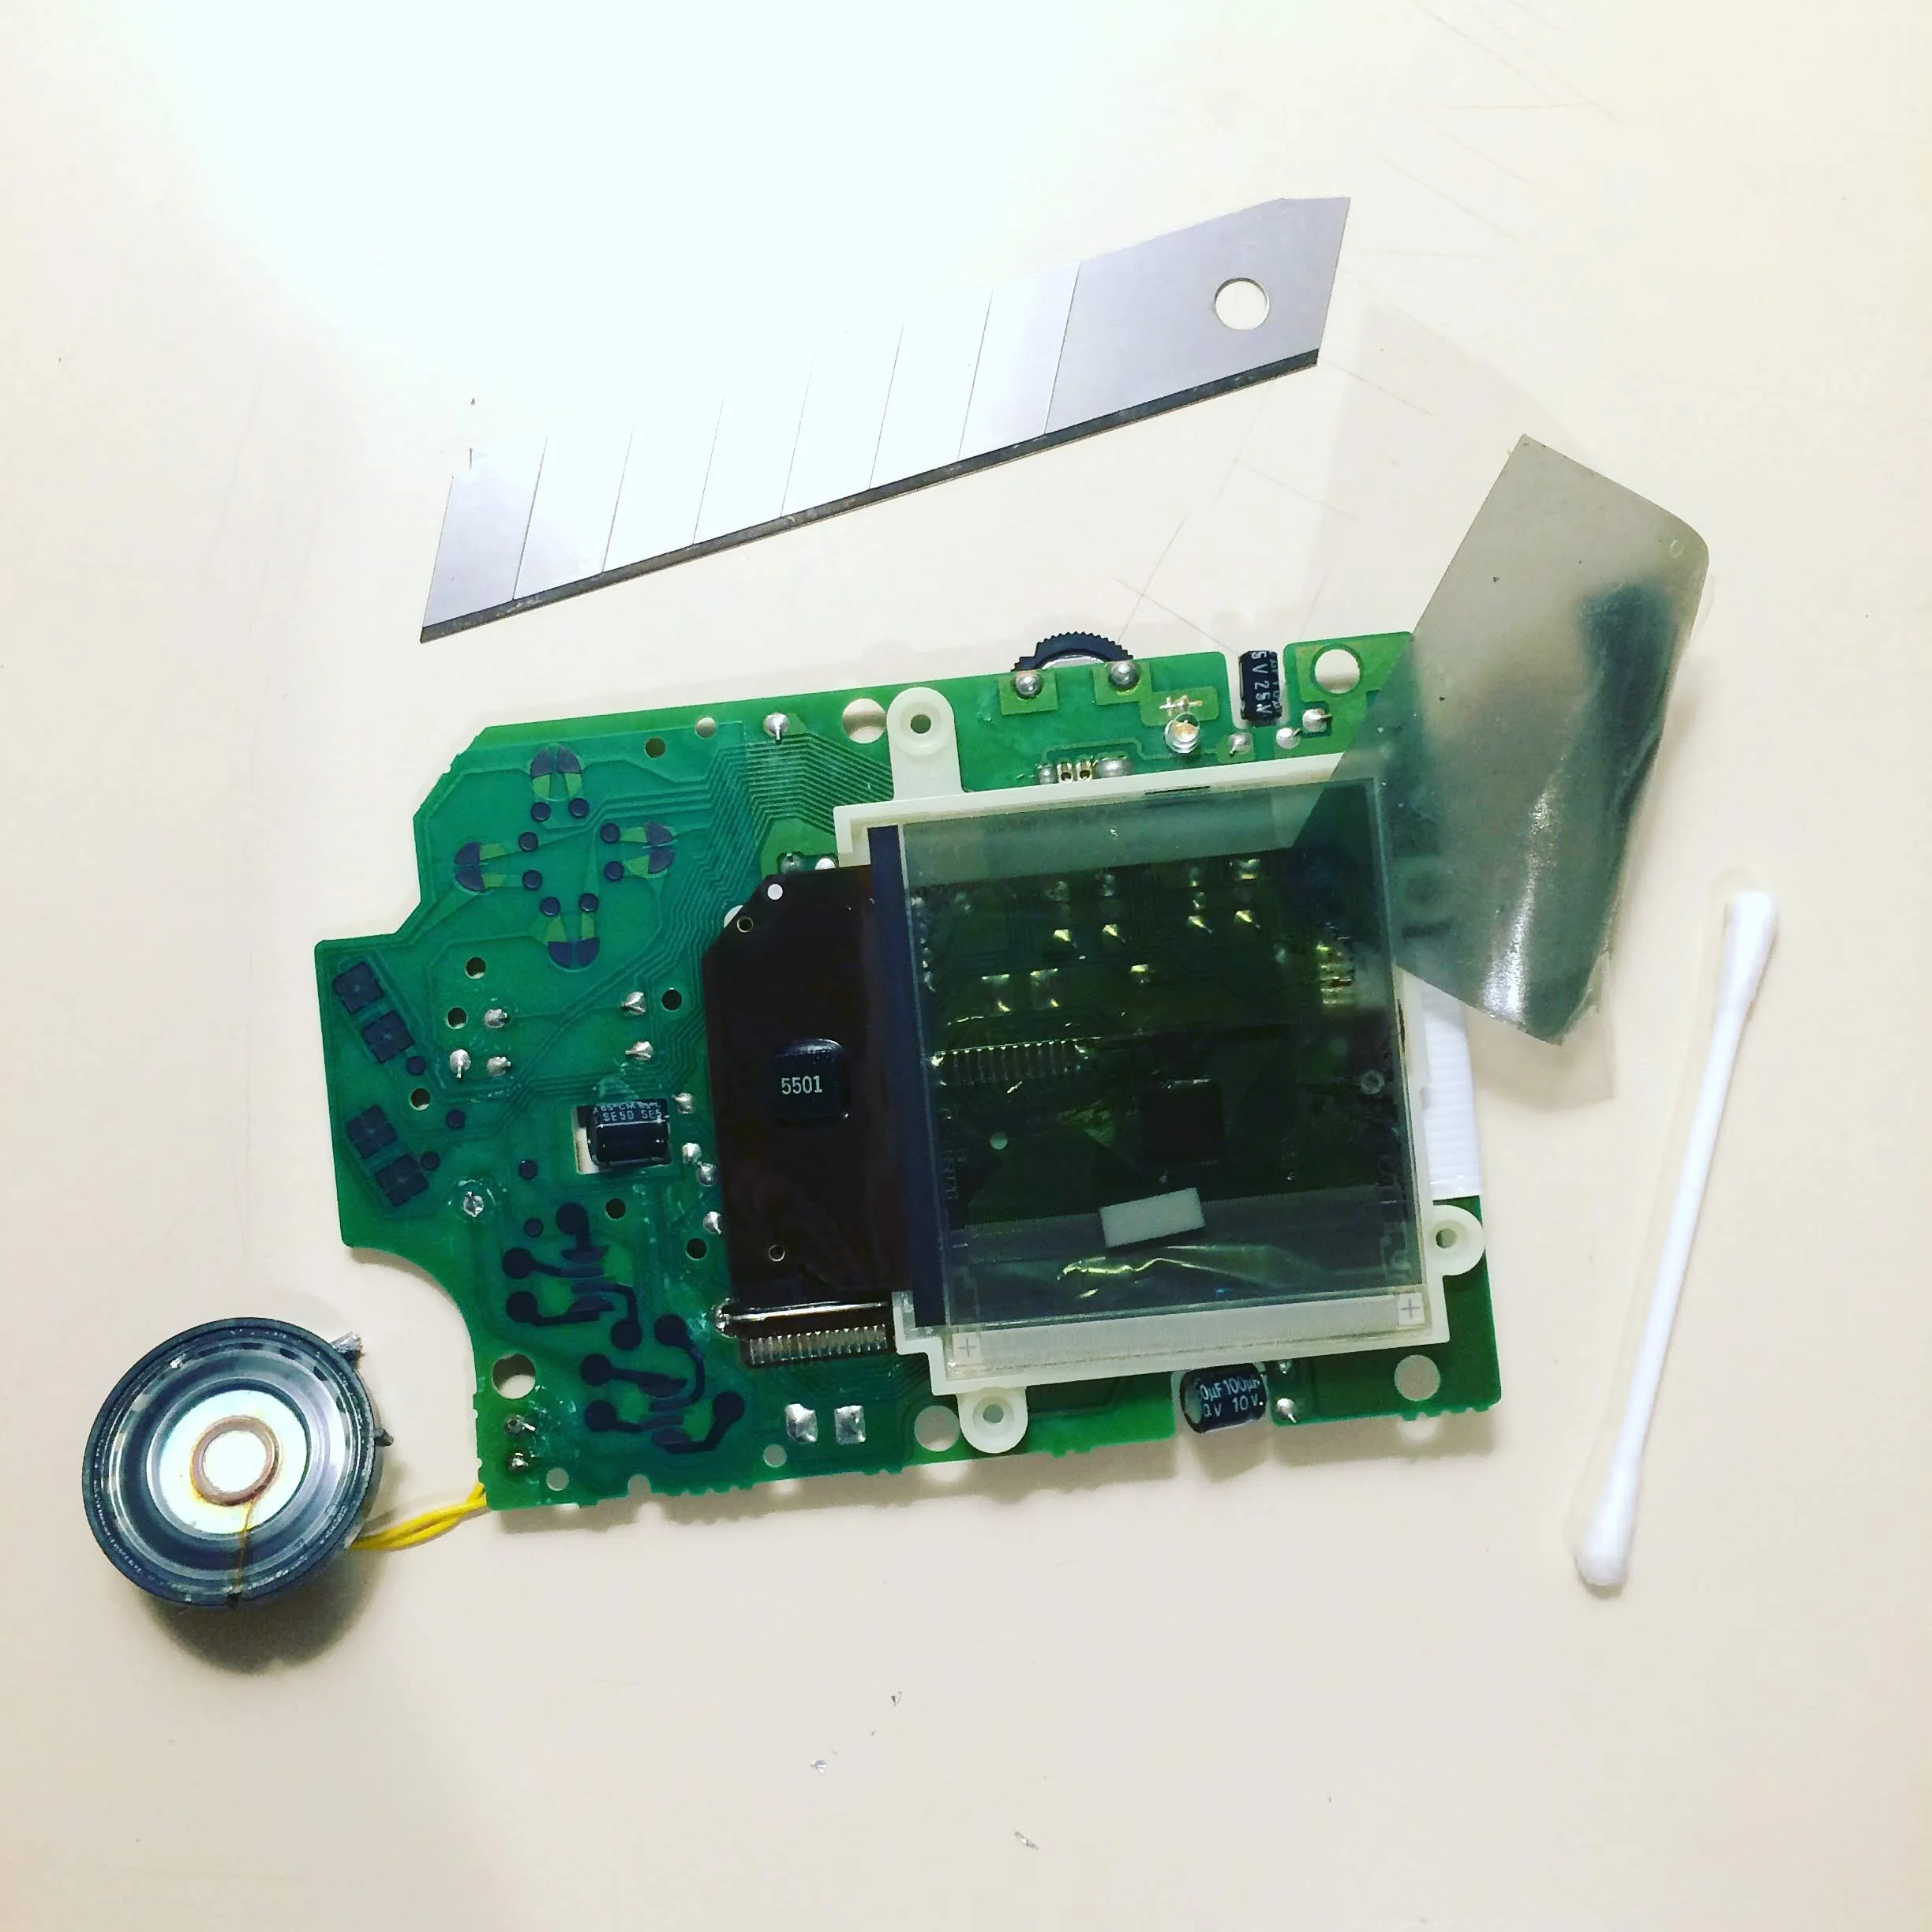
Half past eleven at night, July 7th. The grey sheet at the right is the polarising film, off in one piece. The blade and the cotton swab are the entire toolkit.
It came off intact and I sat back and breathed out. That’s the photograph. I took it because at that moment the project had gone from “might end in a bin bag” to “is going to happen”, and I wanted the receipt.
Why you invert the picture twice
Here’s the part I enjoyed most, and it’s the bit that isn’t obvious.
Adding a backlight to a DMG makes the screen brighter and worse. The original display is dark pixels on a pale green reflector, and when you light it from behind, the pale background lights up just as much as everything else. Contrast falls apart and the picture washes out.
The fix is to invert the image, so you get bright pixels on a dark field, which is the arrangement backlit displays actually want. And you do it twice.
The first inversion is electrical. The bivert module is a 74HC04 hex inverter on a tiny carrier board. You lift two pins on the LCD ribbon connector, sit the chip under them, solder them to the carrier, and run a wire to ground. Every pixel that was on is now off.
The second inversion is optical, and it costs nothing. The polarising film you just spent an hour removing goes back onto the front of the screen rotated ninety degrees. Rotating a polariser through a right angle flips the image again.
Two inversions land you back where you started, except that both the pixels and the background have swapped sides on the way. The picture ends up the right way round, on a dark field, with more contrast than the original had before you touched it. A backlight on its own is worse than stock. A backlight and a bivert together is better than stock.
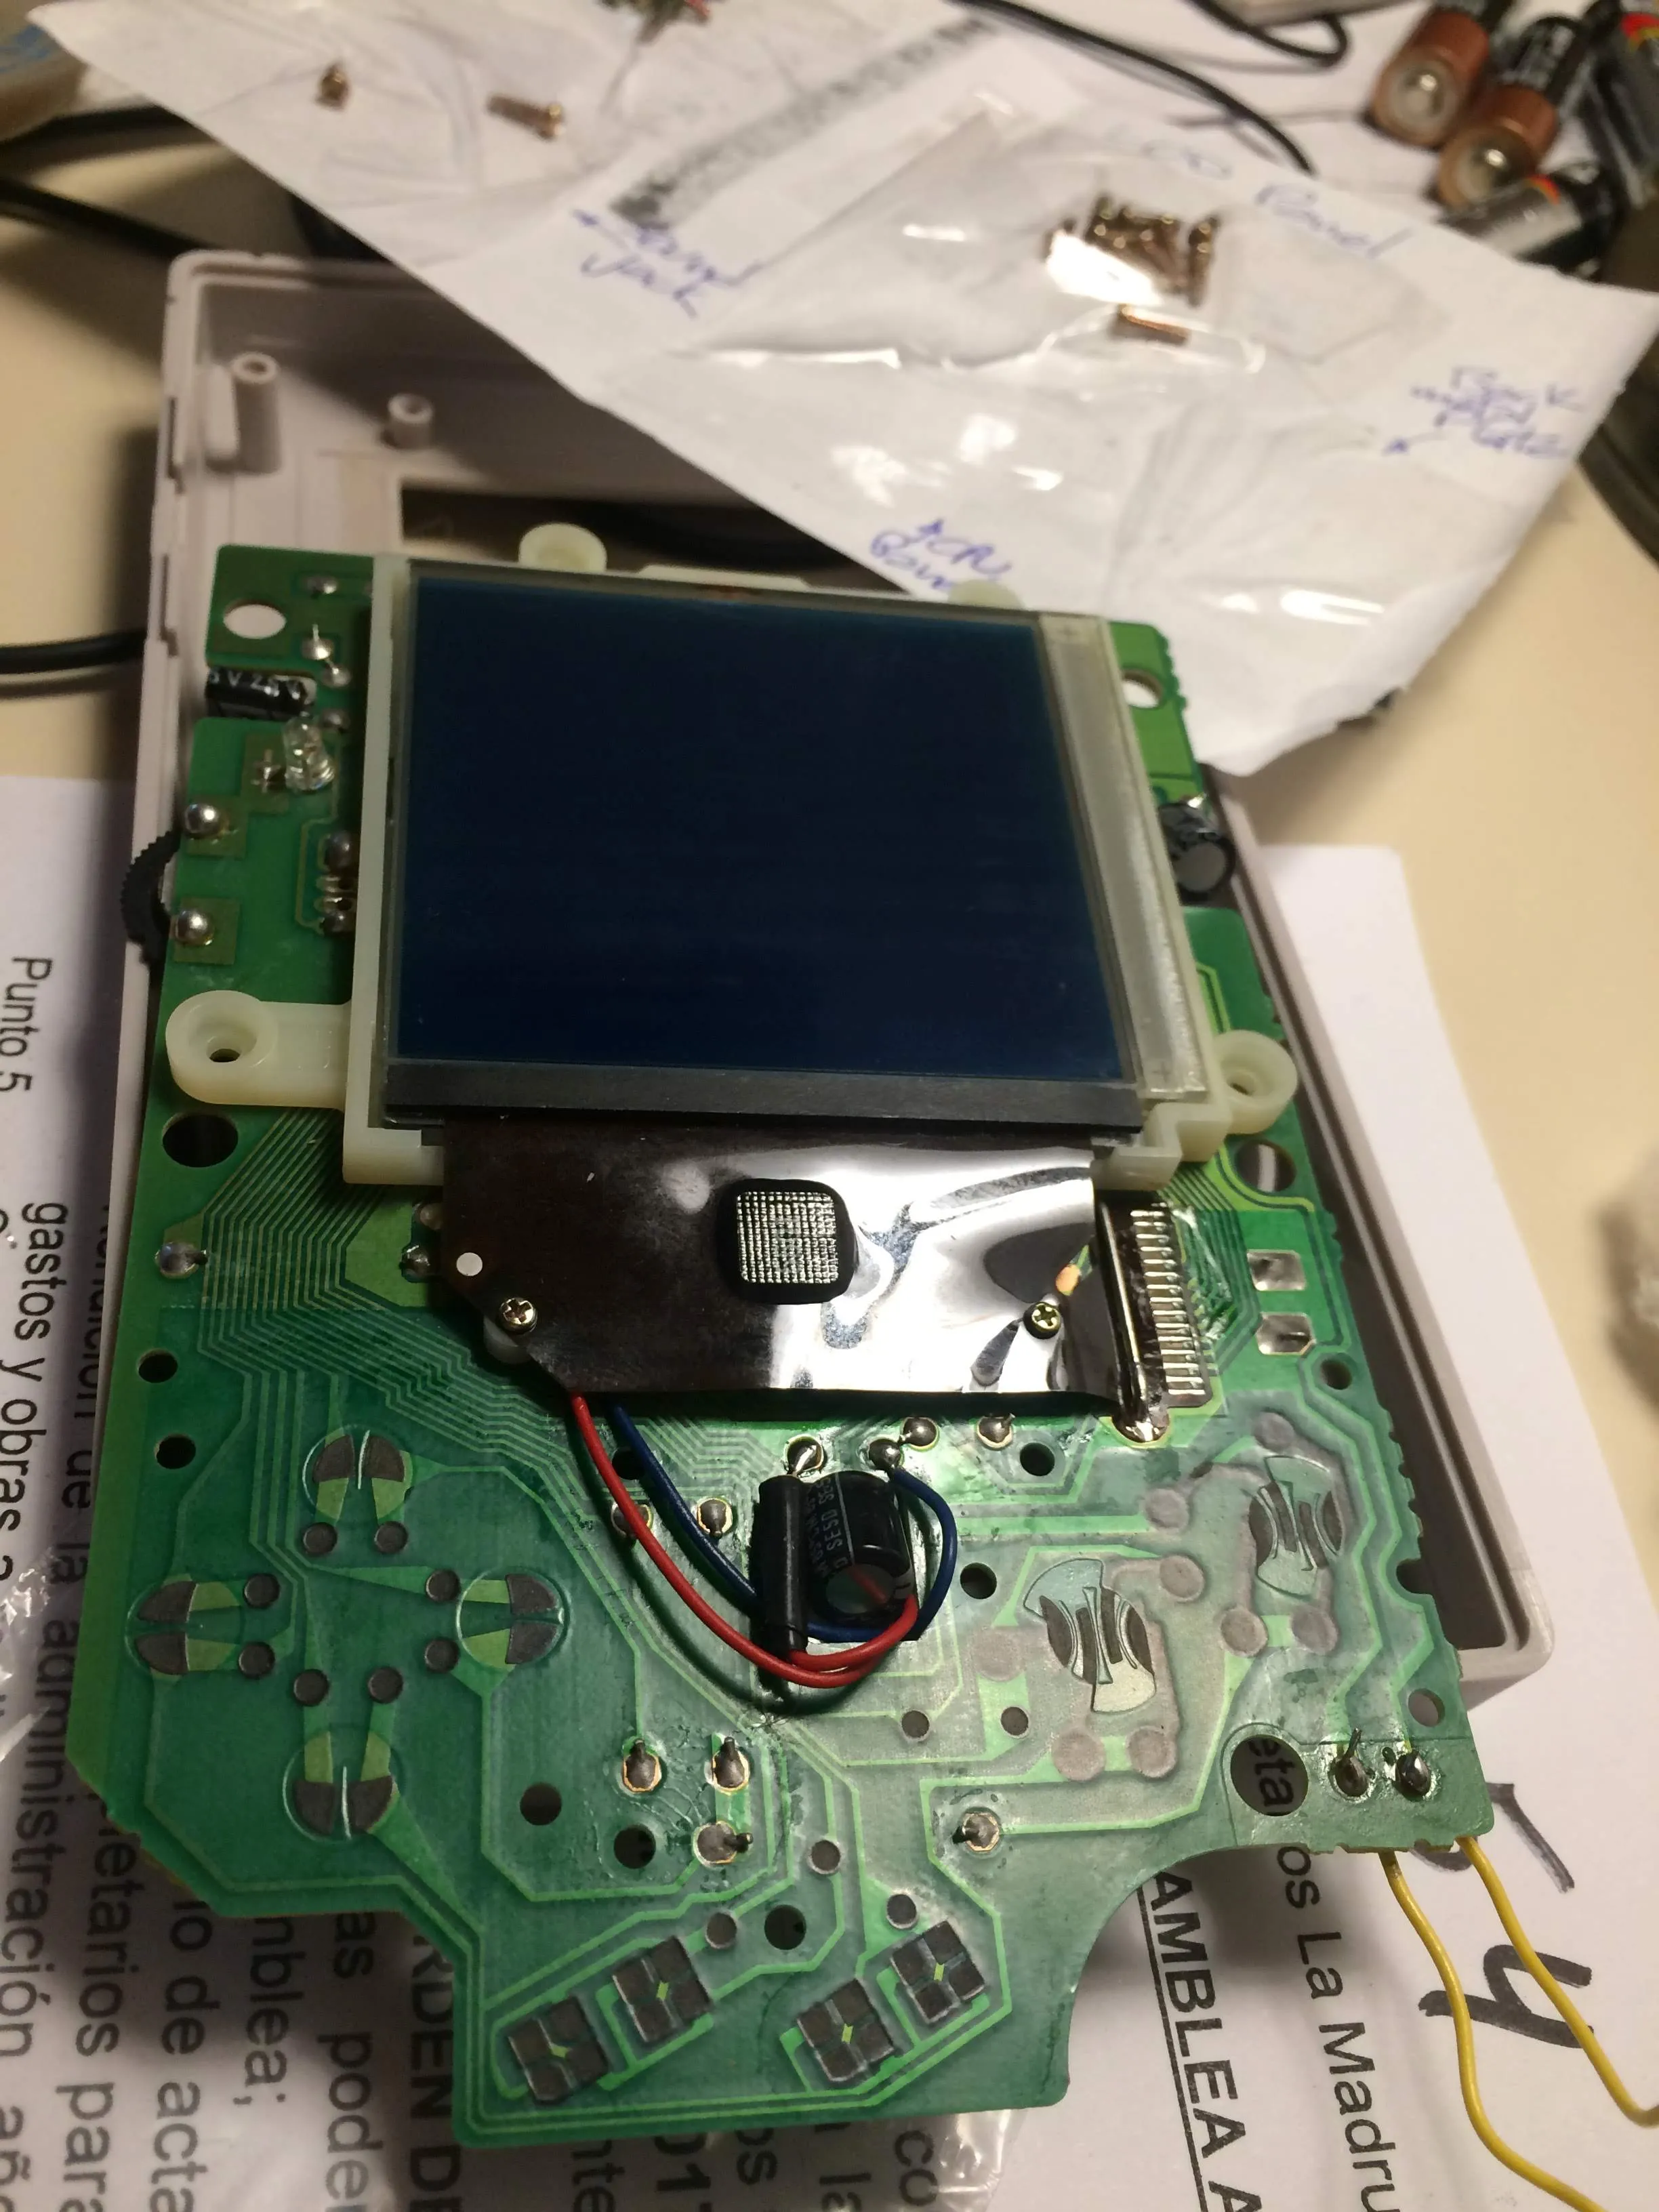
The backlight’s power taken off a DC line on the board. The screen reads as solid navy at this point because its reflector is gone and its film is not back on yet.
The screen was never the point
Everything above is the part people photograph. This is the part I actually wanted.
An unmodified Game Boy has one audio output, the headphone jack, and it sits after the internal amplifier and the volume wheel. That amplifier is noisy. It was designed in 1989 to drive a small speaker and a pair of headphones for a child, and it is entirely adequate for that and useless for recording.
The pro sound mod, which the chiptune musician Trash80 published years ago, taps the stereo signal earlier, ahead of the amplifier and the volume pot, and brings it out to its own connectors. You lose volume control on that output and you get a clean line-level signal that goes straight into a mixer or an interface.
I drilled the top of the shell for two RCA jacks and wired them to the tap.
The screen work was so I could see what I was doing. The audio tap was the reason the console was on the desk at all, because I wasn’t restoring a toy, I was building an instrument that had to be recordable.
I thought I had no photographs of this. Going back through the folder for this post, I found two. In the shot of the desk below, the front shell on the paper towel already has both holes drilled, and in the last photograph in this post you can see the jacks fitted.
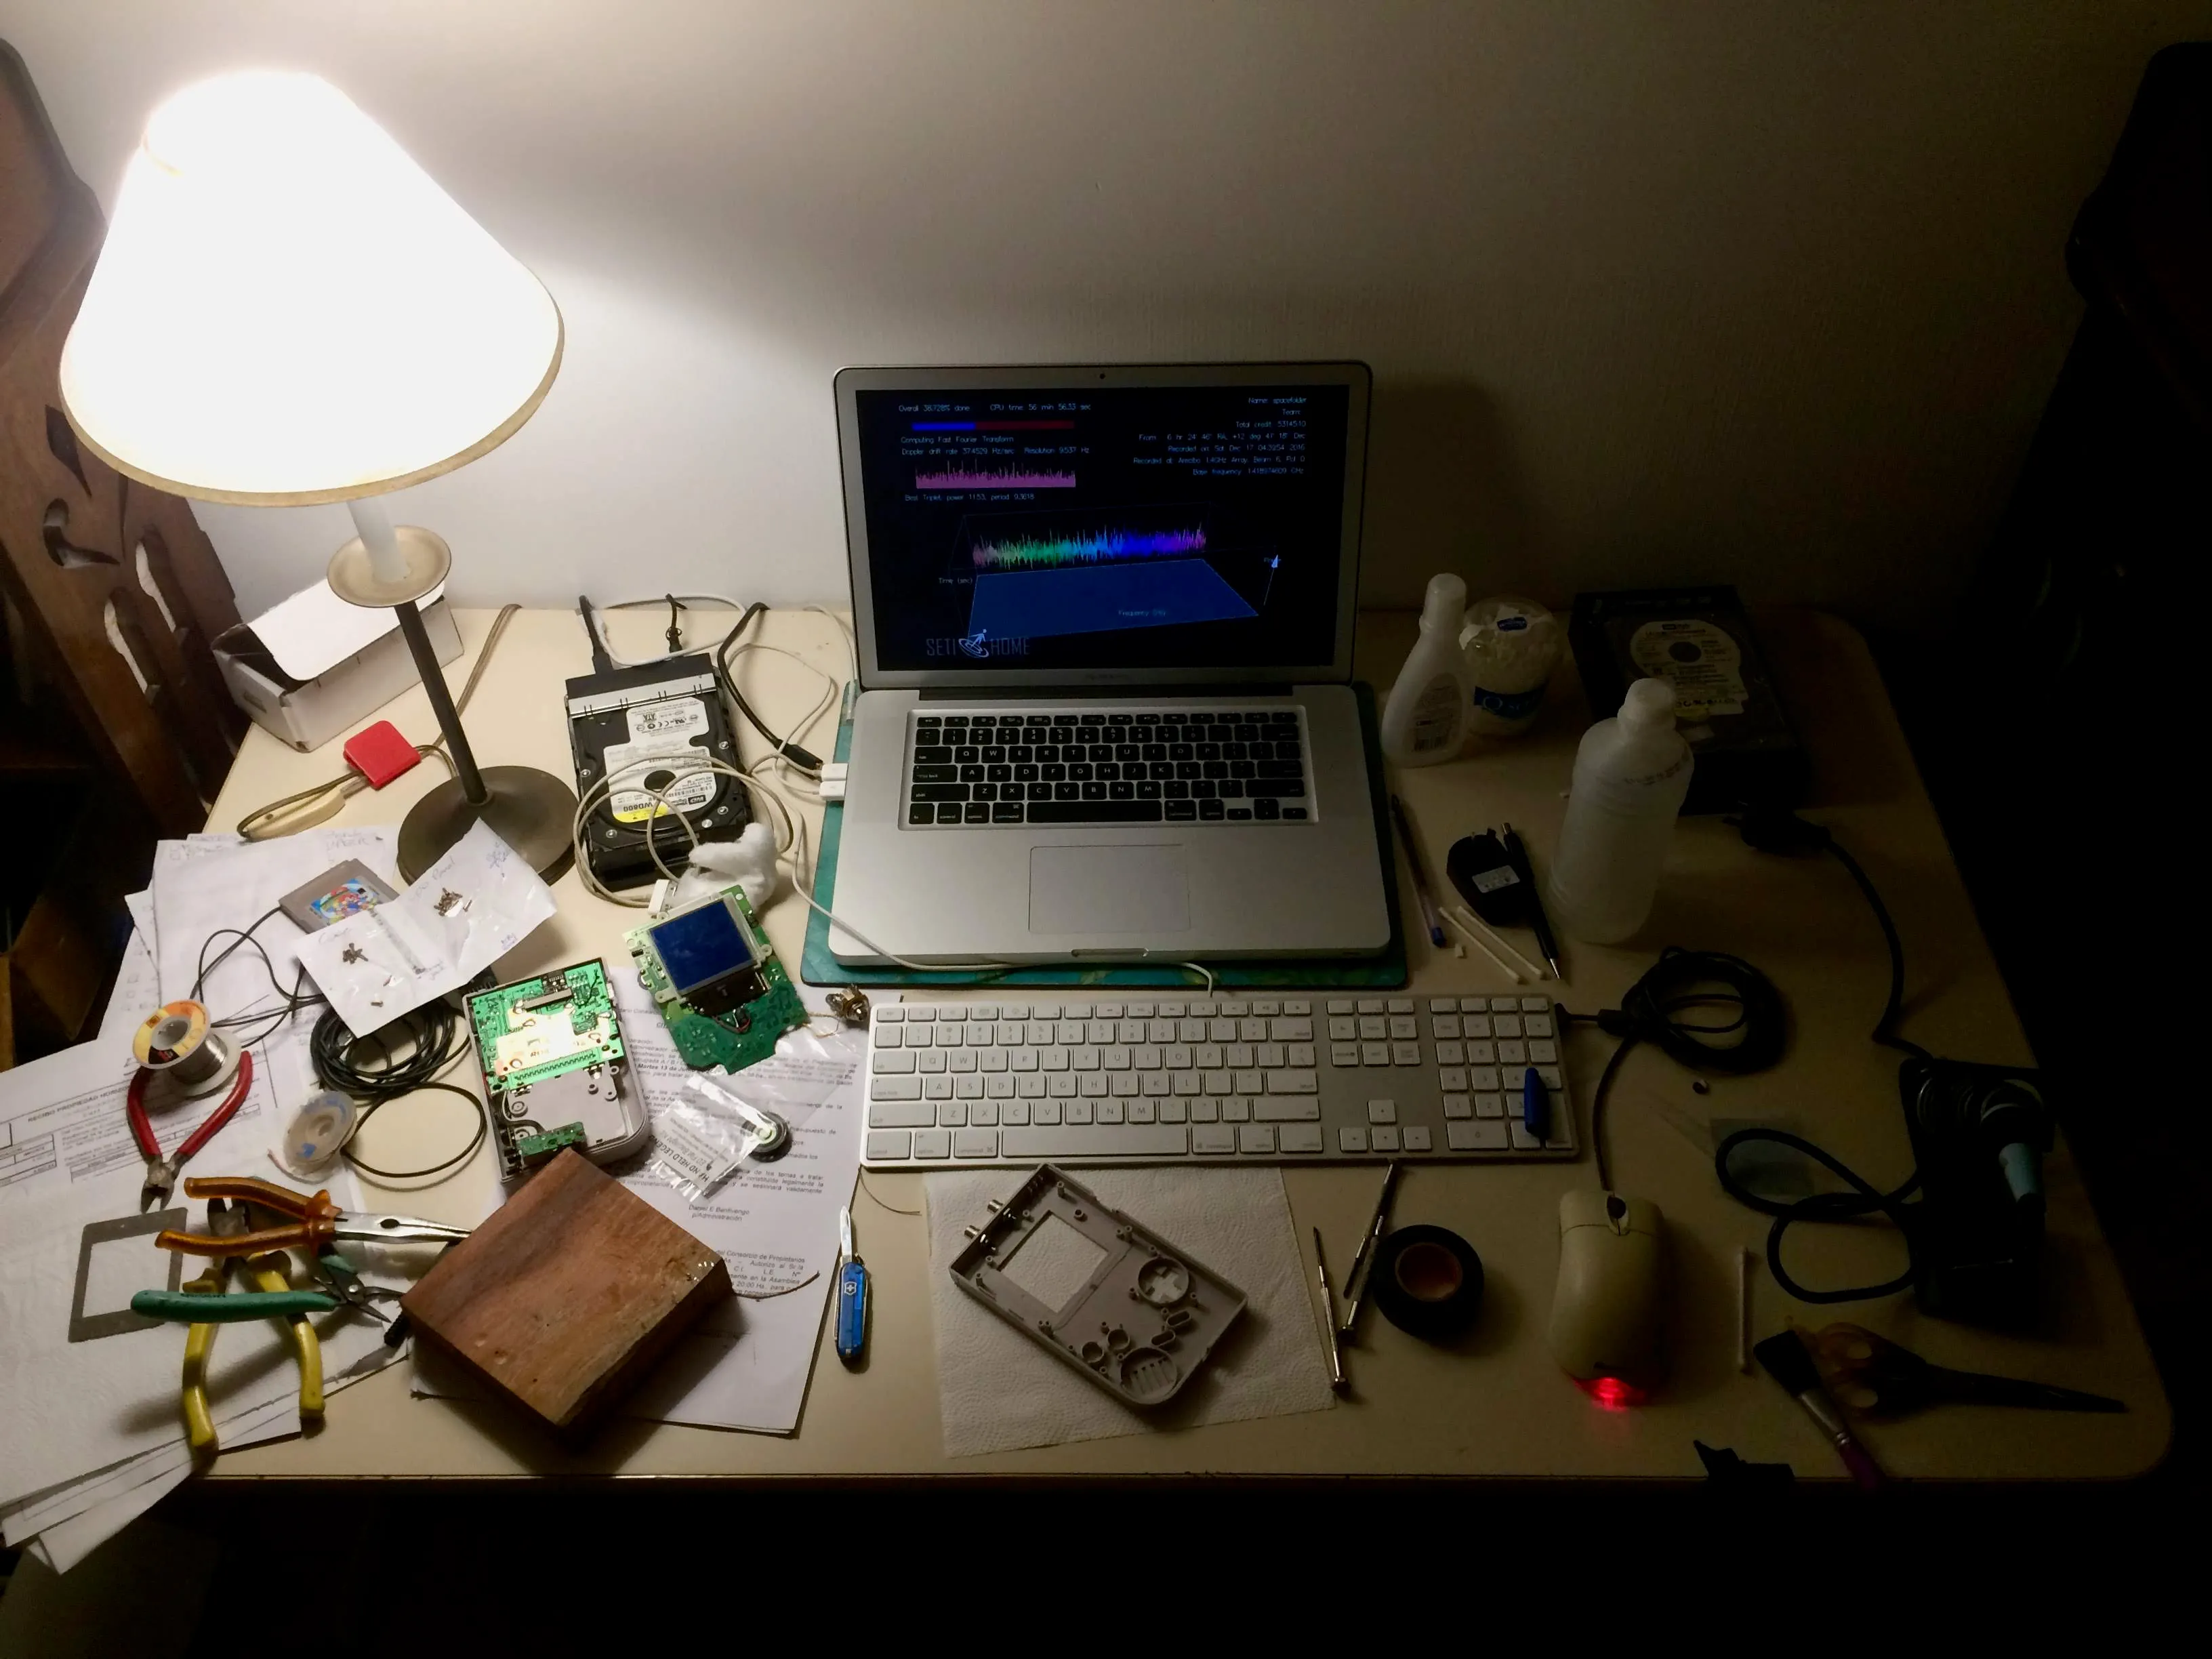
The bench at ten past eight that night. The shell on the paper towel already has its two RCA holes. The laptop is running SETI at home on a recording from Arecibo, which had been quietly chewing through radio telescope data on my machines for years, because of Carl Sagan and Cosmos.
Tetris, then Mario
Bench test first, with the case still open, because closing a Game Boy means undoing the screw map and I only wanted to do that once.
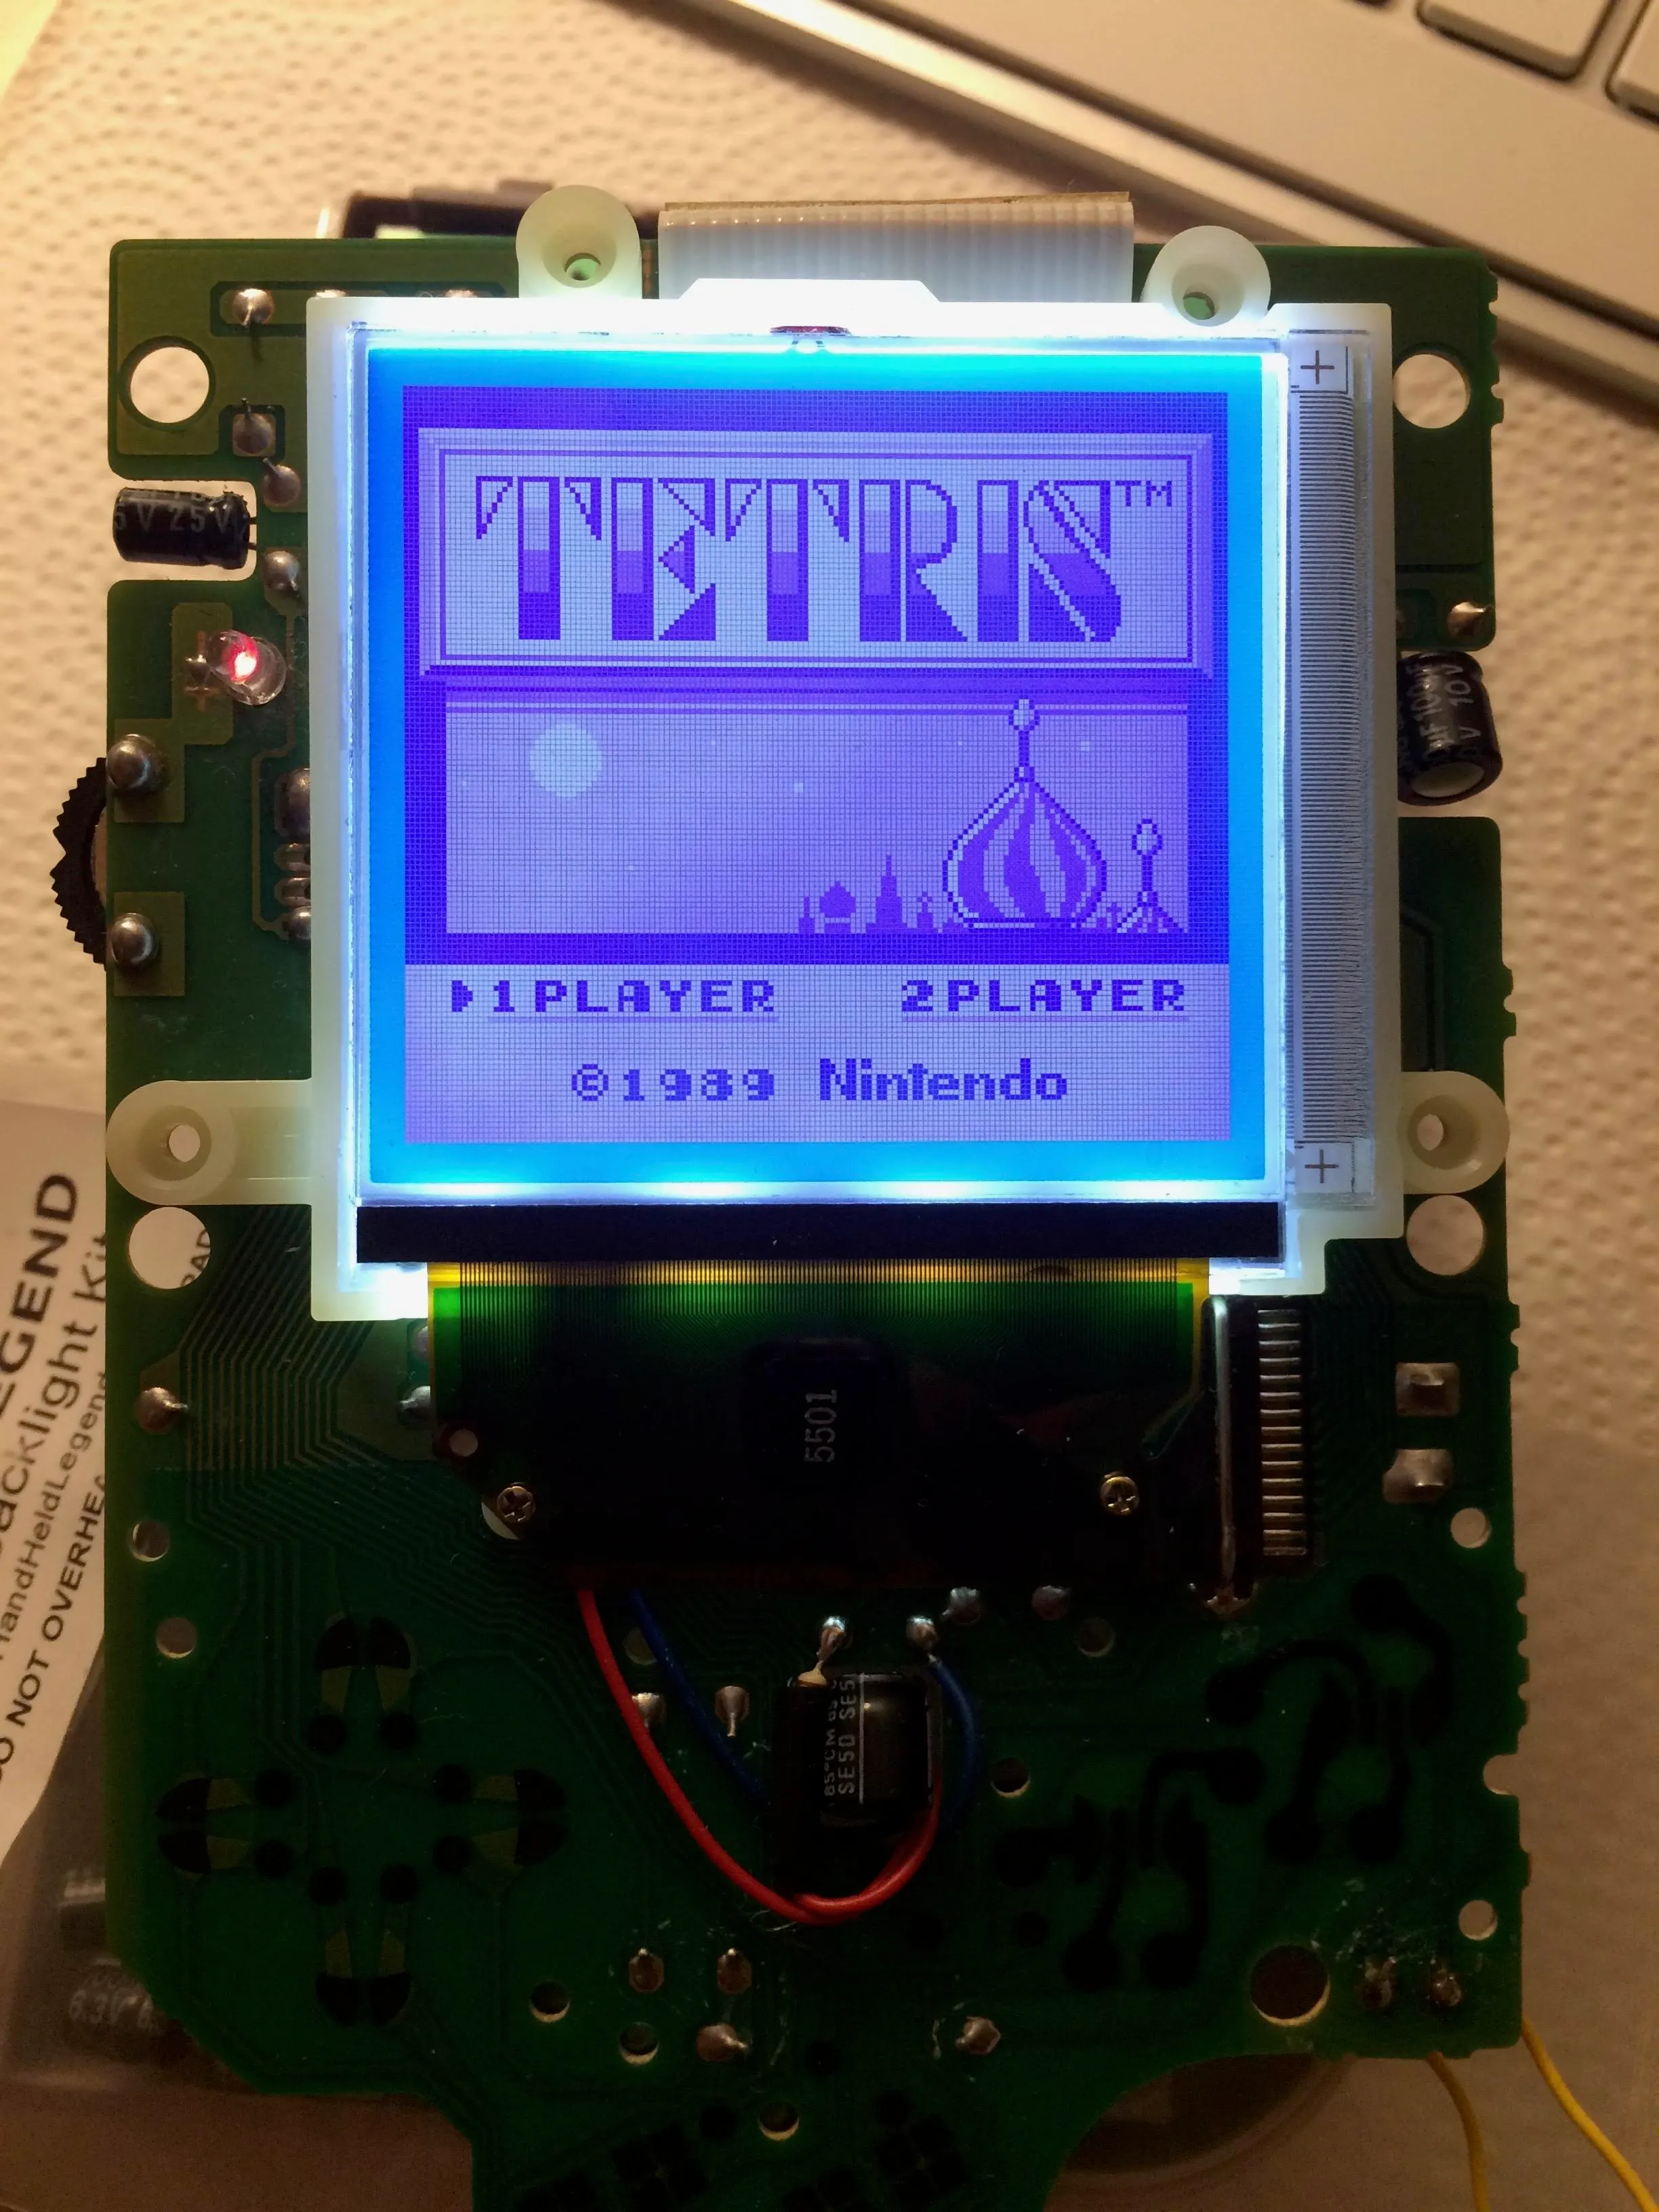
A quarter to eleven at night, July 8th. Backlight on, image inverted, Tetris running. The printed sheet under the board is the kit’s own instructions.
Then the screws came back off the map in reverse order, the shell closed, and at twenty to one in the morning I was playing Super Mario Land 2 on a Game Boy that was cleaner than the day it was sold, lit from behind, and wearing two RCA jacks on its head.
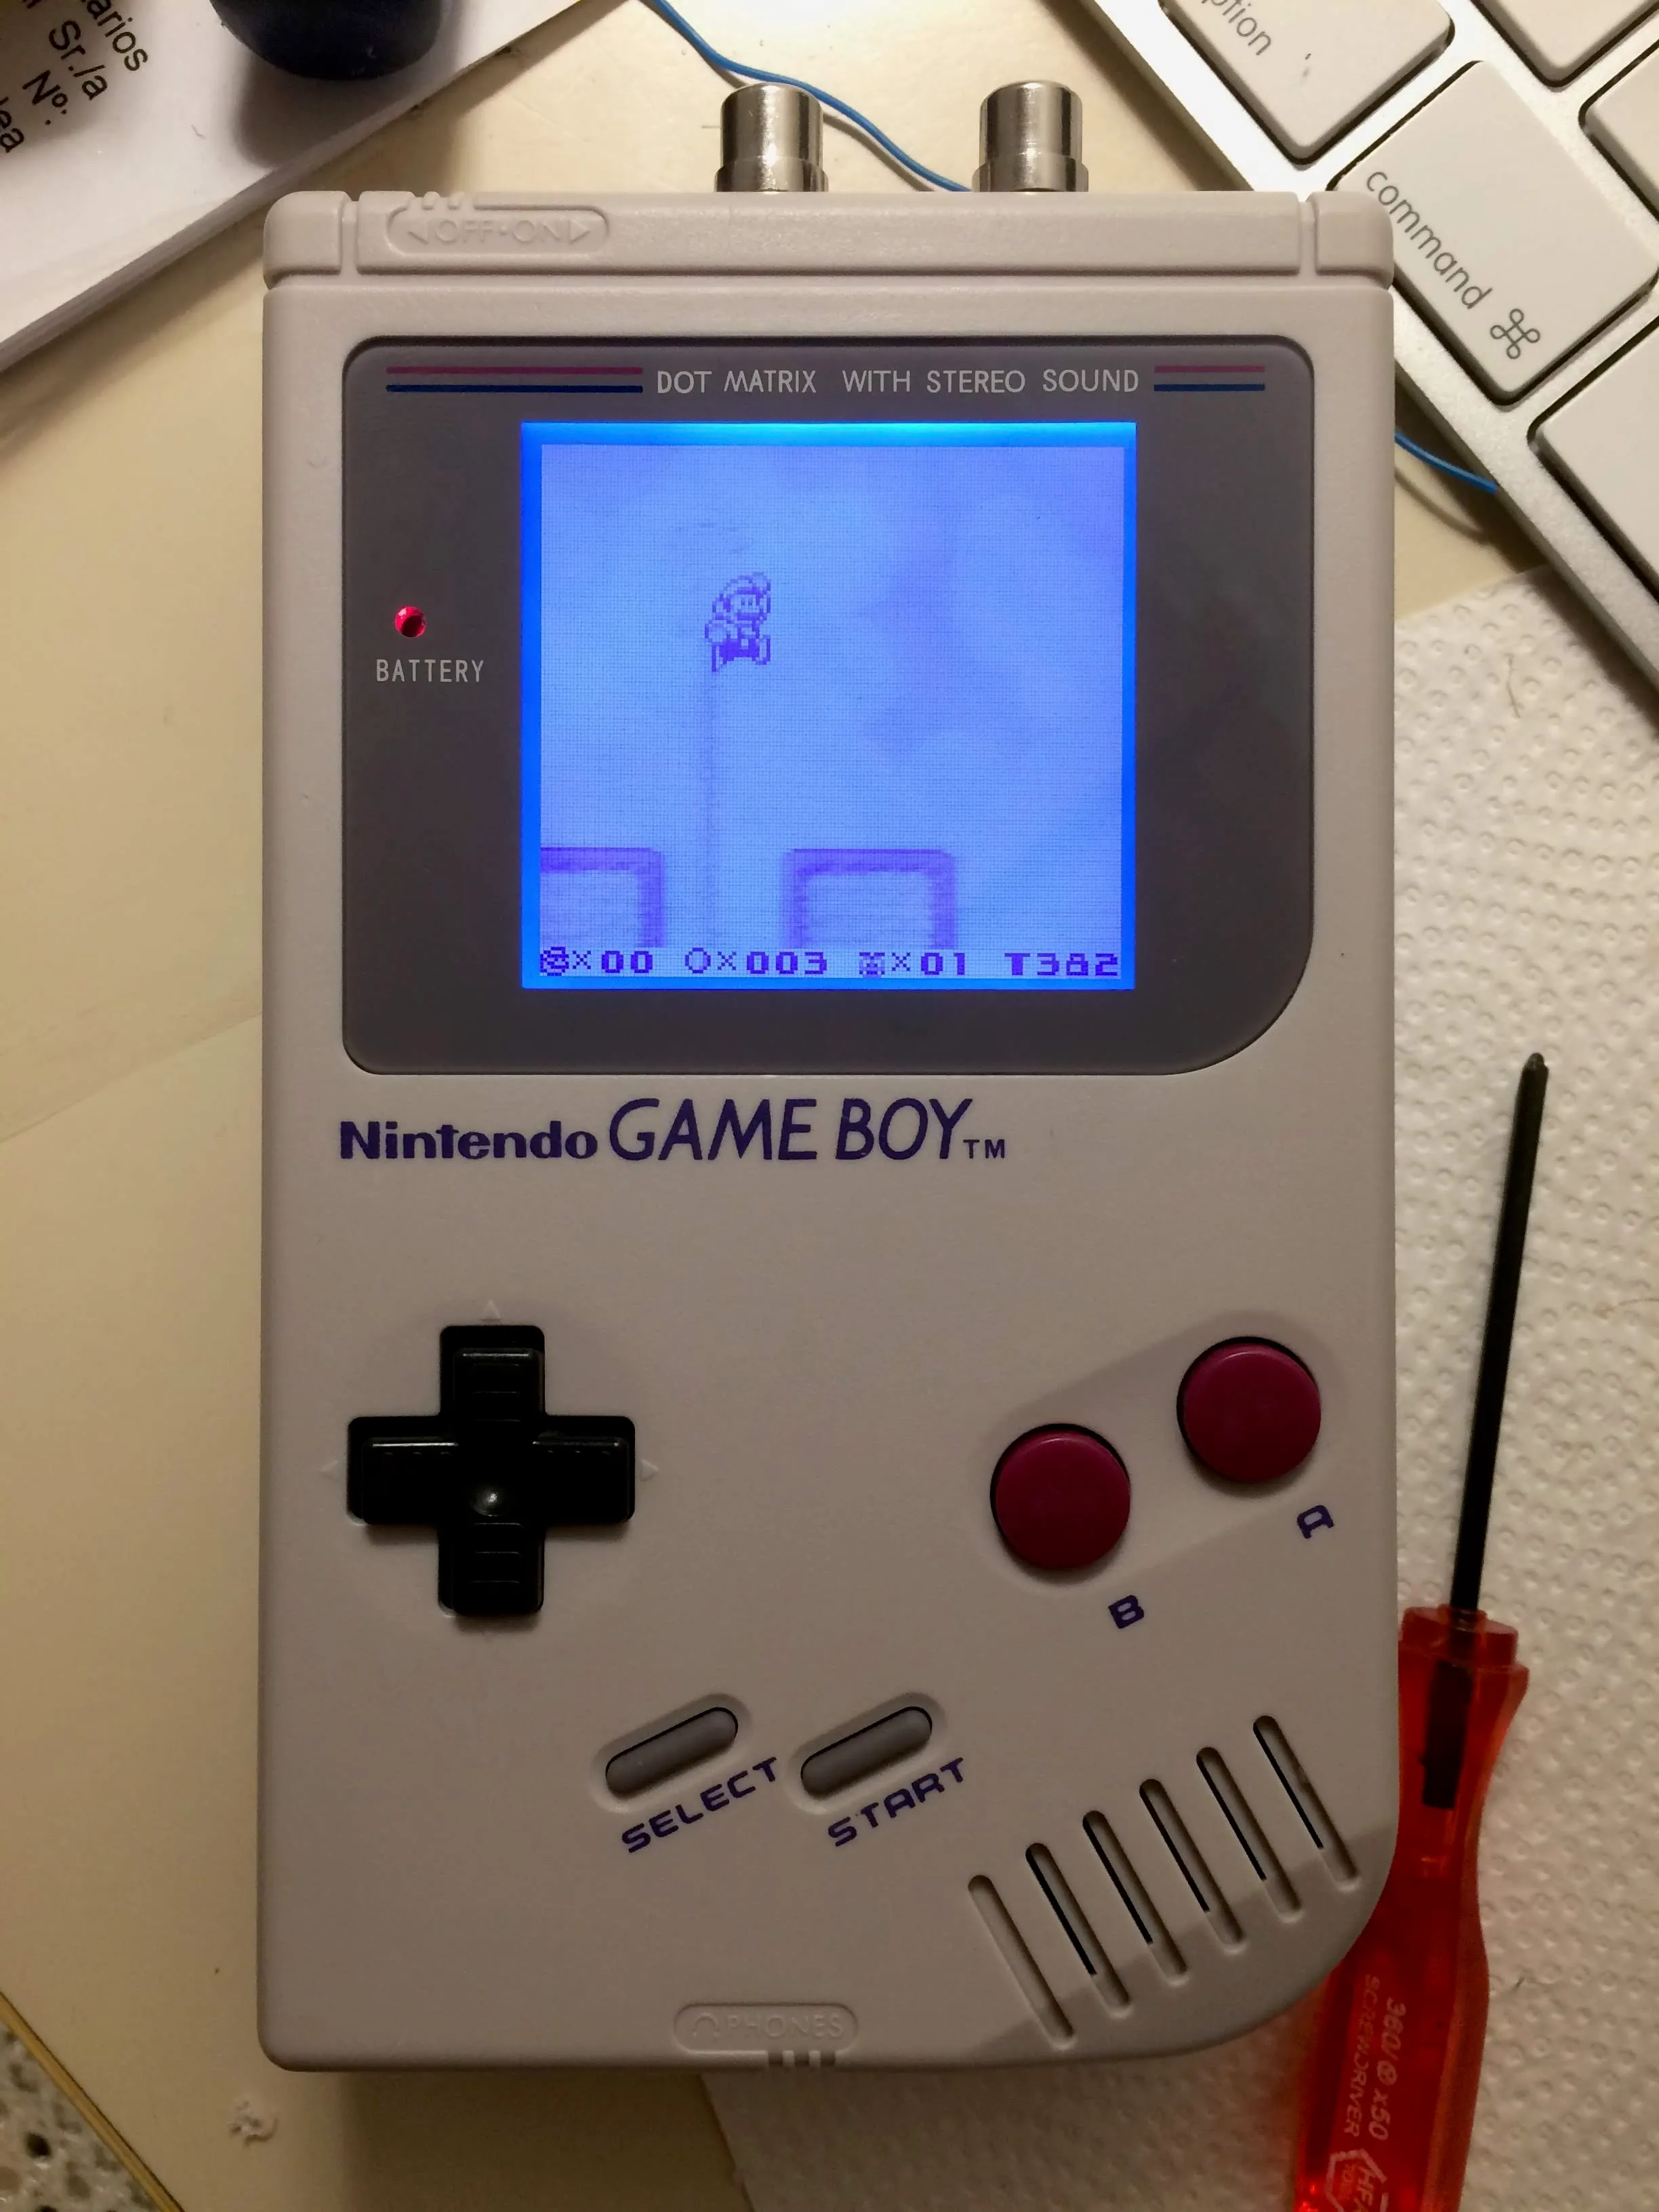
Twenty to one in the morning, July 9th. Backlit, biverted, pro sounded, and back in one piece.
That was the end of the build and not the end of the project, because the software still wasn’t there.
The instrument, eventually
LSDj is a music tracker for the Game Boy, written by Johan Kotlinski in 2000 and still maintained by him now. It’s the reason people mod these machines at all. It turns the four sound channels of a 1989 handheld into something you can actually compose on, with a live mode built for playing to a room.
To run it you need a cartridge you can write to. Mine is a BennVenn El Cheapo, a flash cart with a microSD slot, made in Australia. It arrived on August 2nd, 2017, three and a half weeks after the build.
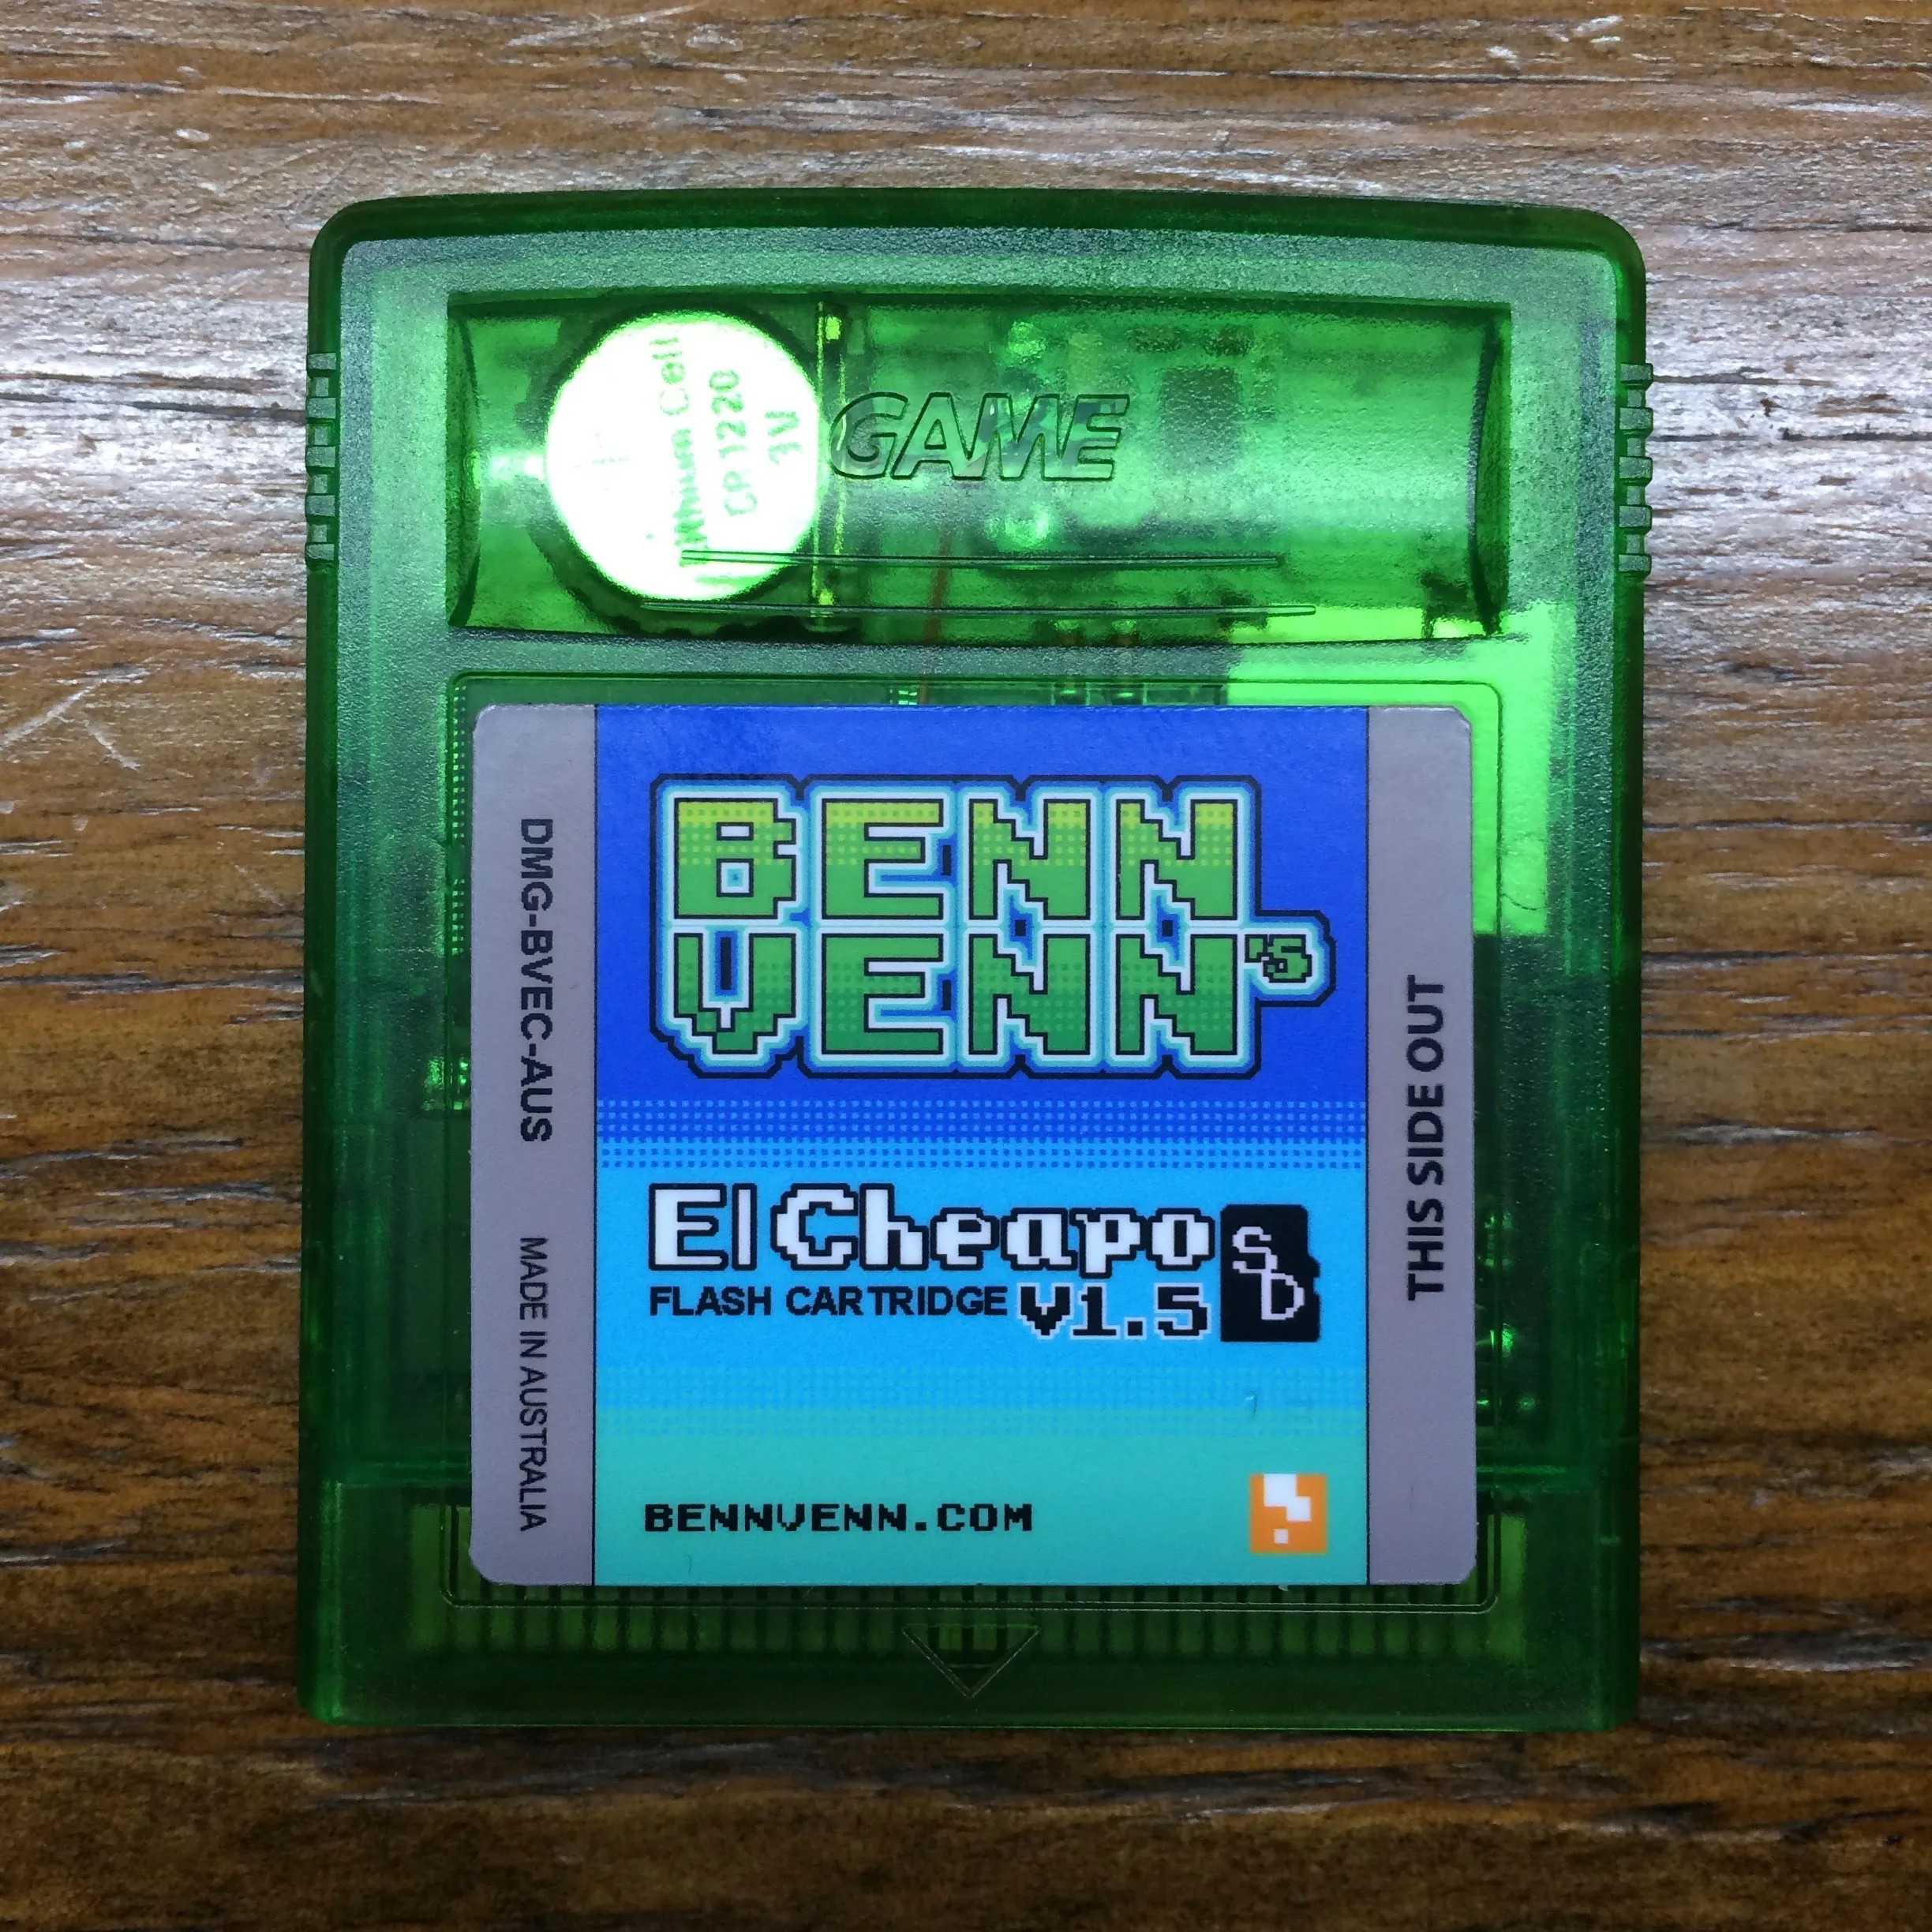
The El Cheapo. A microSD card goes in the top, the ROM goes on the card, and the Game Boy has no idea it isn’t a normal cartridge.
And here’s where my memory had compressed things. I remembered finishing the console and then, the next day, sitting in the sun writing my first tracks on it. That is a nice story and the photographs say otherwise. The first picture I have of this machine actually being used as an instrument is from April 9th, 2018, nine months after the build: out in a field at golden hour, RCA cables running into a battery-powered speaker.
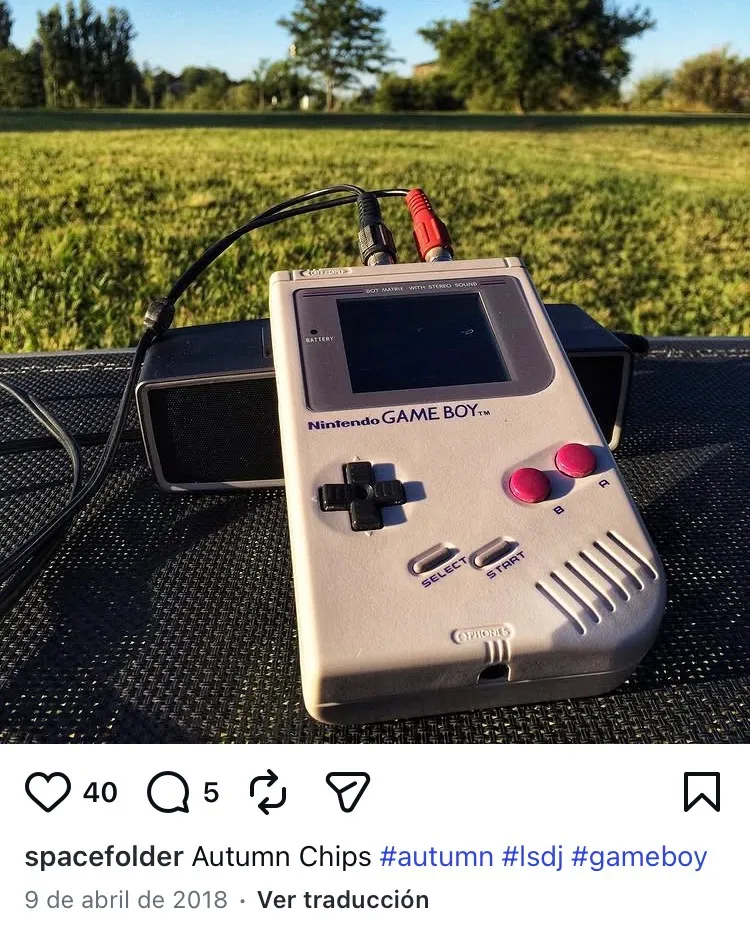
April 9th, 2018. Southern hemisphere autumn, nine months after the build, still being used for the thing it was built for.
I’ll take the real version over the remembered one. A machine that gets carried out to a field nine months later is better evidence than a machine that worked on the night it was finished.
The decisions, on the record
| DEC | Decision | Status |
|---|---|---|
| DEC 001 | The original stays closed. Every irreversible step happens to the donor | SETTLED |
| DEC 002 | Read the board revision through the battery window before ordering parts | SETTLED |
| DEC 003 | Map and tape every screw by zone before removing the first one | SETTLED |
| DEC 004 | Retrobrite the donor’s shell only, accepting that it will re-yellow eventually | SETTLED |
| DEC 005 | Replace the button pads first, purely to prove the board still boots | SETTLED |
| DEC 006 | Peel the original polarising film rather than buy a replacement LCD | SETTLED |
| DEC 007 | Bivert as well as backlight. A backlight alone is worse than stock | SETTLED |
| DEC 008 | Tap the audio ahead of the amplifier and volume pot, out to two RCA jacks | SETTLED |
| DEC 009 | Bench test with the case open, and close the shell exactly once | SETTLED |
| DEC 010 | Build on a DMG-CPU-03 rather than hunt for an 04 or later | REVISED |
DEC 010 is the one worth arguing about, and it depends on the beat I’ve left open near the top of this post. The board I modded is the revision the chiptune scene tells you to skip for exactly the use I had in mind. It works. I’ve written music on it. But if I were sourcing a donor again for this specific purpose I would hold out for an 04 or later, and it would cost me nothing to do so.
What carries over
I want to be careful about what I claim here, because the temptation with a post like this is to make a weekend of soldering sound like engineering.
I didn’t invent any of it. Retrobrite is somebody else’s chemistry. The bivert is somebody else’s module and it shipped with instructions. The pro sound tap is a mod from years earlier with a hundred write-ups. If you handed the same box of parts to anybody patient, they’d get the same result.
What the project actually needed was an order of operations, and that part does generalise. Find the step that can’t be undone. Do everything else first. Before you get to it, spend a little money proving that the expensive step is even worth attempting. Label what you take apart while you still know what it is. Test with the case open, and close it once.
That’s the same sequence I ran on a wireless network in 2006 and it’s the same one I run now on automation work, where the irreversible step is usually a migration or a cutover rather than a sheet of glass. The stakes change. The question doesn’t: what here can I not take back, and what can I learn cheaply before I get to it?
The Game Boy is still in a drawer, still works, and still has the yellow one sitting next to it, untouched.